4g61t.org

Specializing in the 3g CSM
It is currently Tue Mar 19, 2024 3:16 am

All times are UTC-05:00


Post new topic  Reply to topic  [ 171 posts ]  Go to page 1 2 3 4 512 Next
Author Message
PostPosted: Mon Oct 19, 2009 11:48 am 
Offline
Member

Joined: Sun Sep 07, 2008 6:30 pm
Posts: 150
Location: Cape Coral, FL
Before we get started with the build of the current car, lets get a little background.

About a year ago

So I have always been the type to help out all of my friends with their cars/builds. Heck,I pretty much built a car for a friend. It was fun for a while, then working on everyone else's car and not my own started to get old. So I started the search for a decent shell that wouldn't need too much work to make it what I wanted. I searched for a while, And found a 2G fwd with a 6 bolt swap for trade for a daily driver. I contacted the owner and he was interested in trading for one of my daily’s. So The deal went through and I got the car. The owner didn’t know much about the car, and when he told my how much he payed for the car I was dumbfounded. Come to find out the car had a fully built 6 bolt that the previous owner(wich turned out to be a friend of mine) built and never got it running. And this guy bought it and didn’t know enough to finish the swap. So I parked it in a spare garage, and it sat for about 6 months. I didn’t really want a 2g and I kept going back and forth on what I wanted to do with it. Finally I decided I was going to sell it and go back to looking for a 1g. So I put the shell and tranny up for sale. I figured what the heck I’ll put the motor up for an amount that I wouldn’t mind getting rid of it for. And within a few months the tranny and shell were sold, for alot cheaper then they were worth… but they were gone.

A month ago…

I get an email asking about the motor I had for sale on Craigslist.(mind you I have gotten numerous lowball offers but nothing that I would start over again for) In the Email the guy asked some questions about the motor and we exchanged a few emails. The next email I got said “I would like to take that motor off your hands for you”. The guy came down the following weekend and looked at the motor and handed me what MY ORIGINAL PRICE was, In cash money. So I instantly went on a search for a Shell, And found one a few days later on a local forum that was at a great price and didn’t need too much work. I setup a time to go look at the car, It was in decent shape. The car used to be fully built motor w/sc62 blah blah. But he took all of that and out it in his 2g. Since then the car had been sitting for a while in a field, so it needed a very good cleaning(which I planned to do anyway). But it hadn’t been molested like most of the other cars I had found. So I picked it up.


Okay now that we are all caught back up, lets get to the important part of this thread… I got the car home and gave it a quick wash, Then into the garage it went to start getting torn apart.

Image

I started with the engine bay. Unfortunately, My camera decided the before pics weren’t important. But I went to work at taking off the bumper hood and IC. Which btw is the weirdest setup I have seen, But we’ll get back to that later on in the build. A friend showed up to help speed up the process and we went to work.

Image

And before we knew it we had almost everything out of the bay…

Image

Image

Image

So The engine bay was done for now, And my buddy had to leave. So I started Stripping my interior, But once again the Before pictures disappeared. The car had full interior when I started, not so much when I was done with it ; ) So while my camera was busy digesting my pictures, I was busy working away at the interior. About an hour went by…

Image

A few more hours, And I decided to call it quits. Spent most of my time chasing and killing spiders, they seem to have made their home on the car since it sat in the field for a little over a year.

Image

Image

Image

Well that’s it for now, I'll post some more when I get back.


Top
   
PostPosted: Mon Oct 19, 2009 12:20 pm 
Offline
Member

Joined: Sun Sep 07, 2008 6:30 pm
Posts: 150
Location: Cape Coral, FL
Sound deadening, Oh how I hate you…

So today I decided to remove all of the sound deadening out of the car. So my buddy and I went over to publix and picked up a 10lb block of dry ice.

Image

I was told it was the best and easiest way to remove it. Neither me, or my buddy had done this before so it was a lot of hmm lets try this and, OH! Maybe this will work… At first we tried just breaking the ice into Semi small pieces and just letting them sit in a little area. That worked OK but not all that easy, so we tried smaller pieces so they were spread out more, and just using a small scrapper to chip it off. That seemed to work pretty well, so we thought...

Image

We ended up doing, I’d say ¾ of the car like that.

Image

Then on the drivers side I tried Just completely crushing it to little pebble sized pieces and pretty much snow. This worked perfect, especially if you do a decent sized area, and take the hammer and hit the area you froze. You could pretty much get it all in one piece. As you can see…

Image

Also, I forgot to add that right before I started the drivers side. We ran out of dry ice and had to go buy another 10lb bag. Okay back on track… So yeah The last way is Def the way to do it. It made it to the point that there was virtually no scraping at all. Just hit the material with a hammer and it shattered. We did a majority of the car but then it started getting dark, so we called it a night… There is still some on the center console area and some up by the firewall on both driver and passenger side. But here is where we left it…

Image

And I didn’t Expect to see how much we actually took out and for it to way as much as it did. Once I get it all out I am going to way it. We tried to put as much as we could in the bucket but some got vacuumed up. Here is what we took out. Estimated weight is probably 20-25lbs of material so far.

Image

Image

I have to work tomorrow but I should be done by 1-2 So hopefully I will be able to get the rest out tomorrow and do some more work. Also For anyone that is going to do this, tomorrow I will show you a trick to clean up all the little black pieces left over. It’s very simple and is pretty much automated : )

Till tomorrow…


Top
   
PostPosted: Mon Oct 19, 2009 12:21 pm 
Offline
Member

Joined: Sun Sep 07, 2008 6:30 pm
Posts: 150
Location: Cape Coral, FL
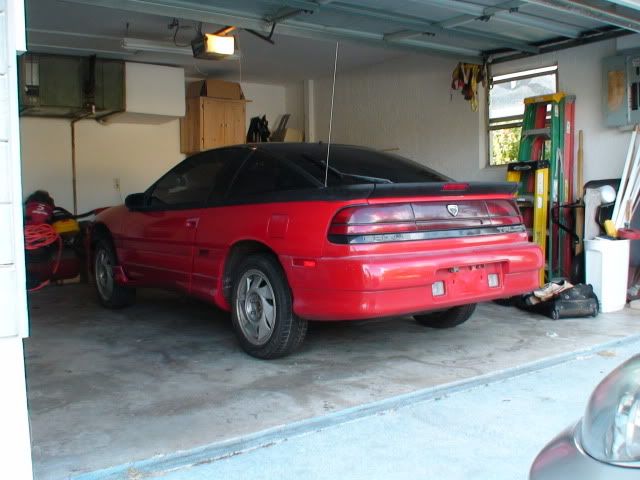
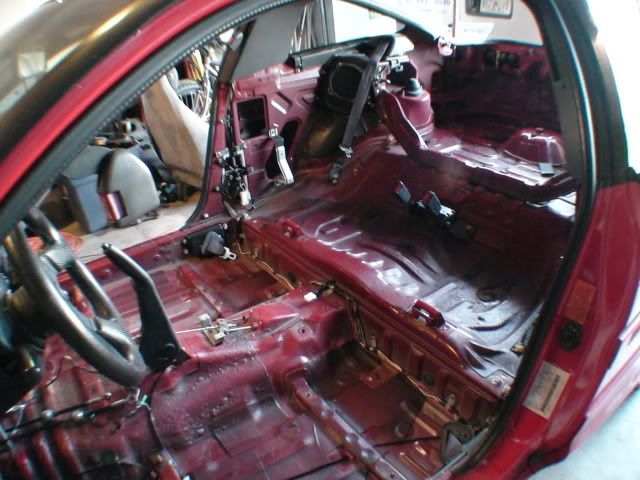
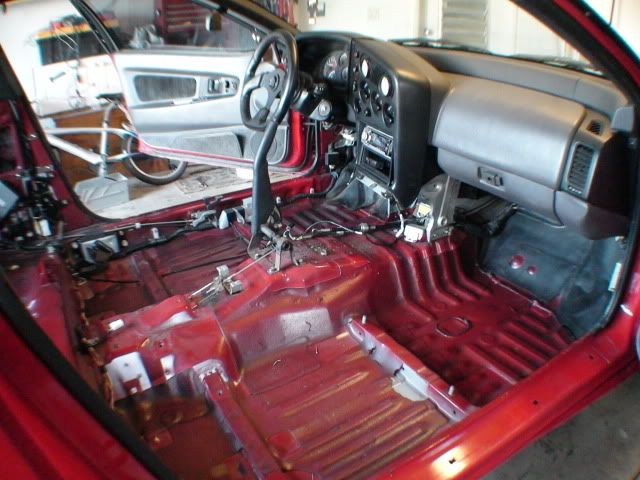
Okay so it’s been a while since my last update. Quite a bit has happened in the past few days. But first I’ll get to the little How-To on removing the left over sound deadening material.

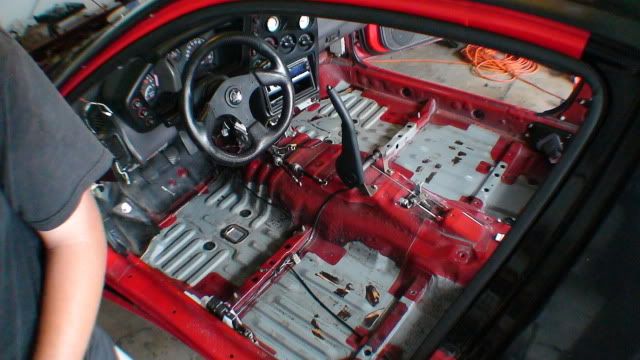
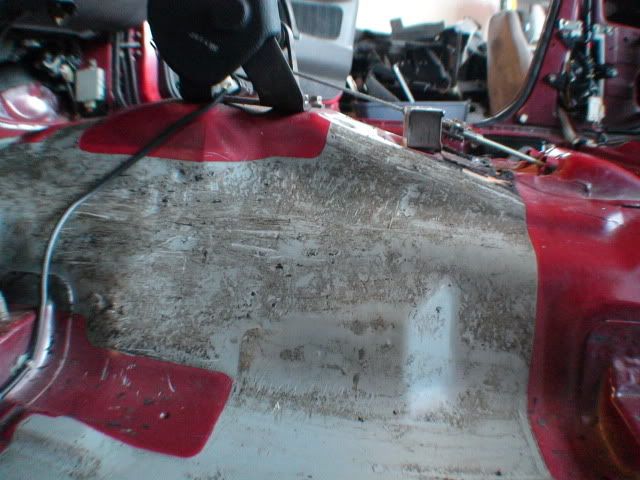
Okay so you have all of the sound deadening out but you have all of this black sticky stuff left over.

Image

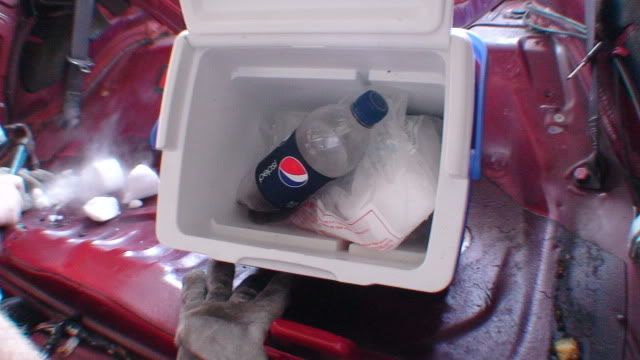
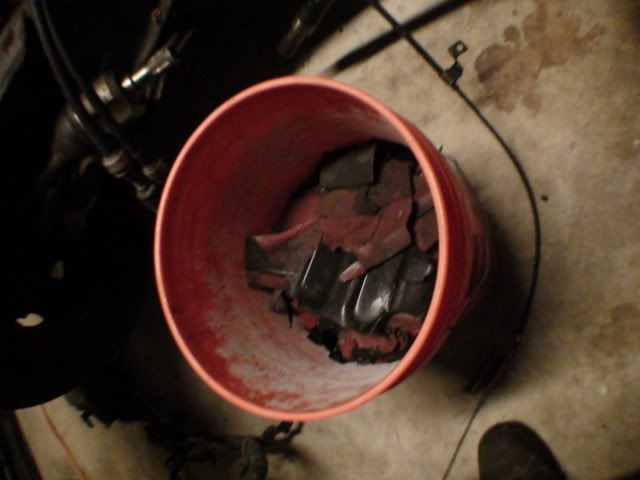
Well here is all you will need to remove all that crap:

Image

That’s right, just a can of good ole’ WD-40 and a rag. All you have to do is spray down all of the area that the sound deadening was on and let it soak in. Just remember the more you spray the easier it will be to wipe away the leftovers. I let each section sit for about 30 mins. You should see as soon as you spray it most of it will start running down to the lowest point in the car. But the bigger chunks will stay.

Image

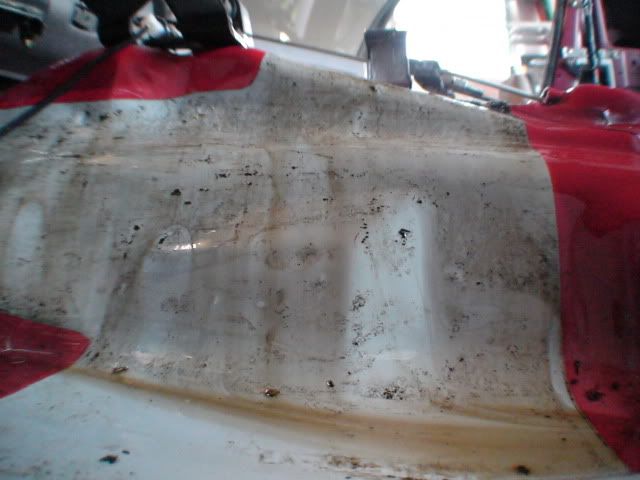
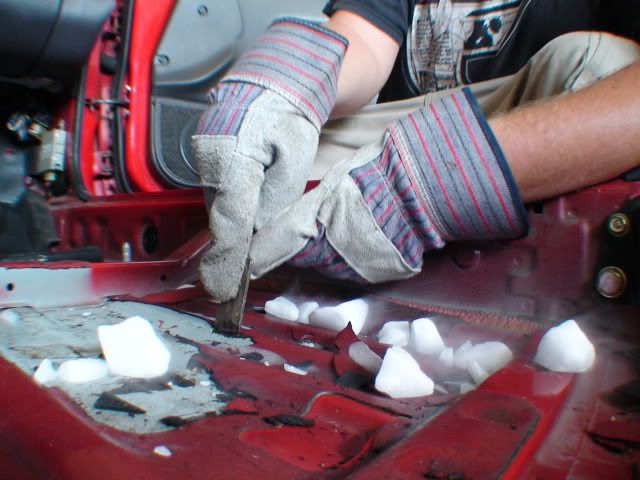
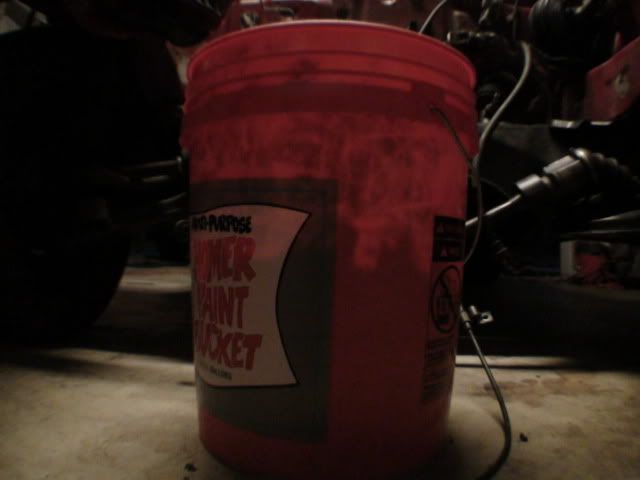
After about 30 mins or so go back and simply wipe up all of the Leftover sound deadening material. Some of the bigger pieces you may have to scrub but for the most part, it should all just wipe off…

Image

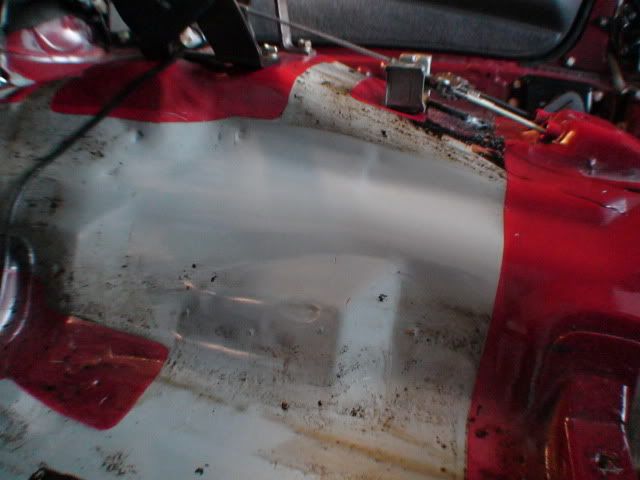
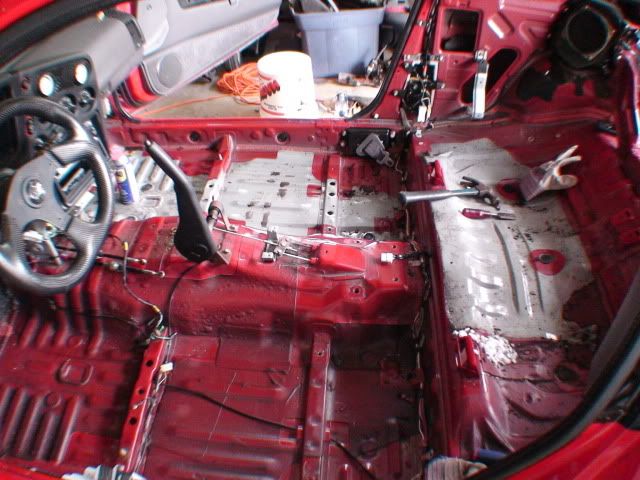
And you will be left with something like this.

Image

Image

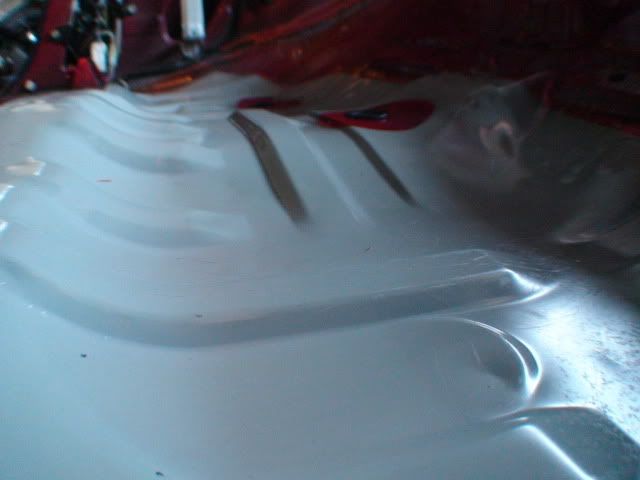
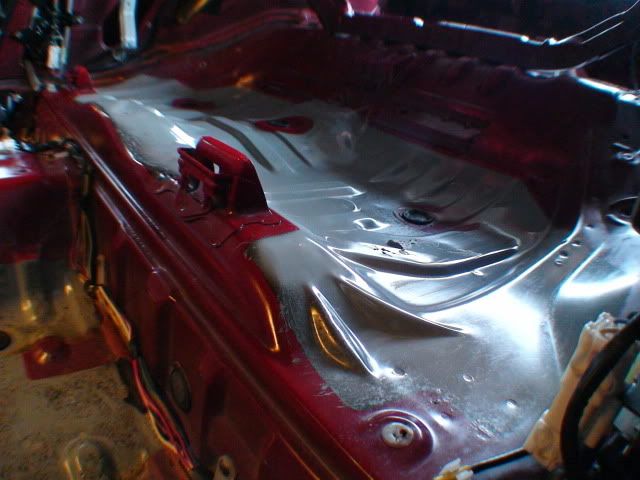
No wasn’t that easy?

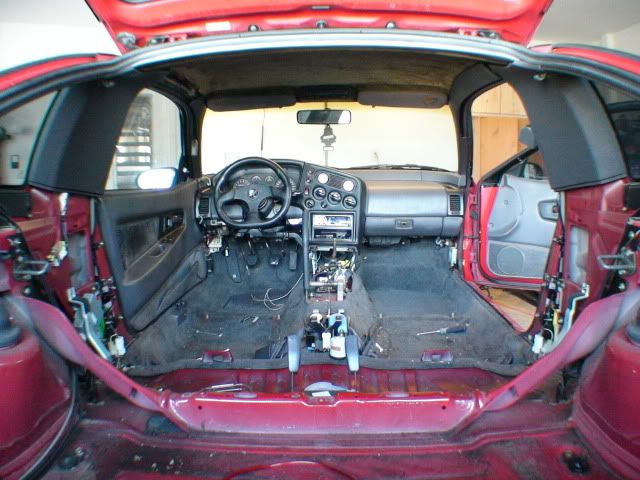
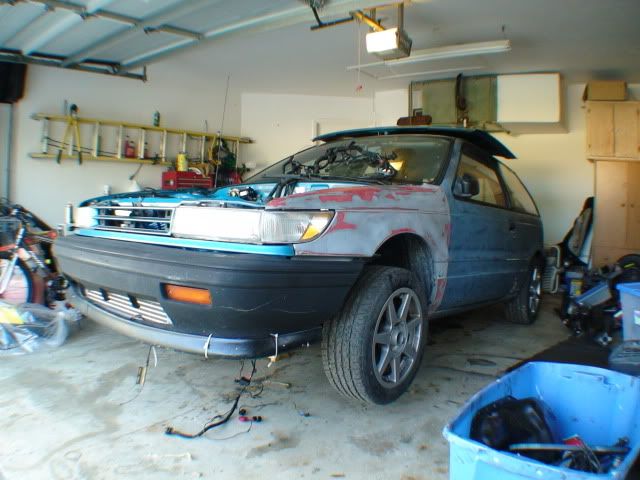
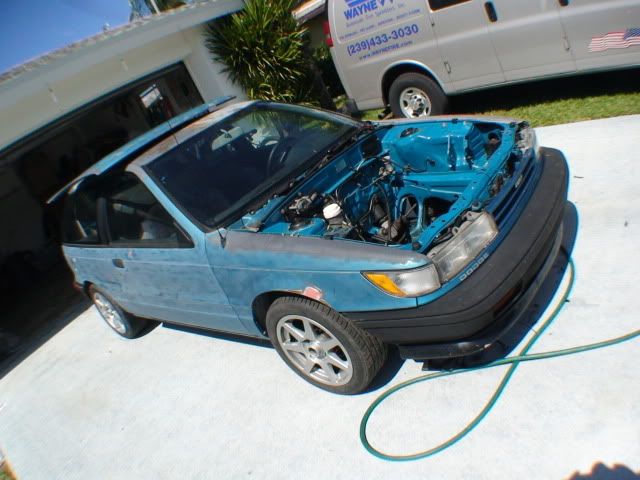
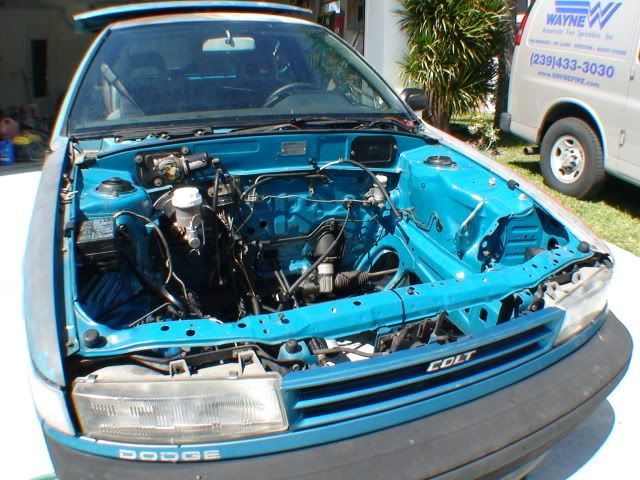
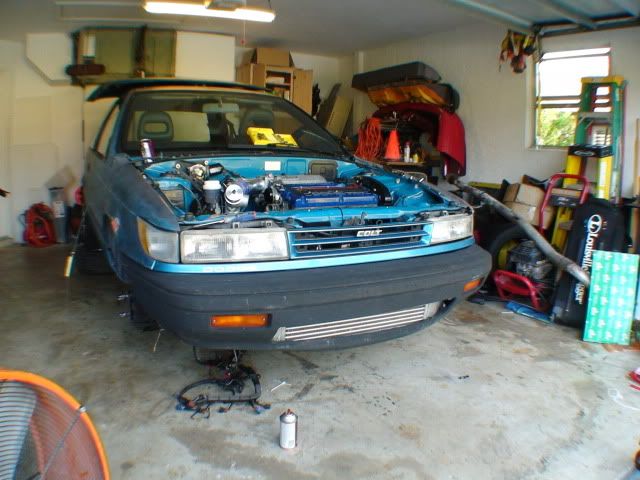
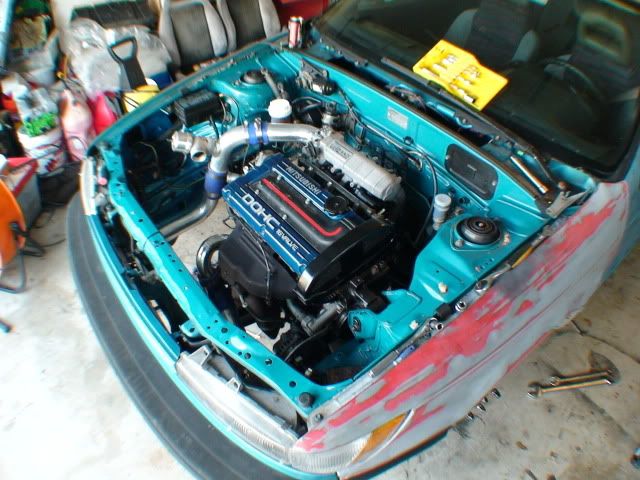
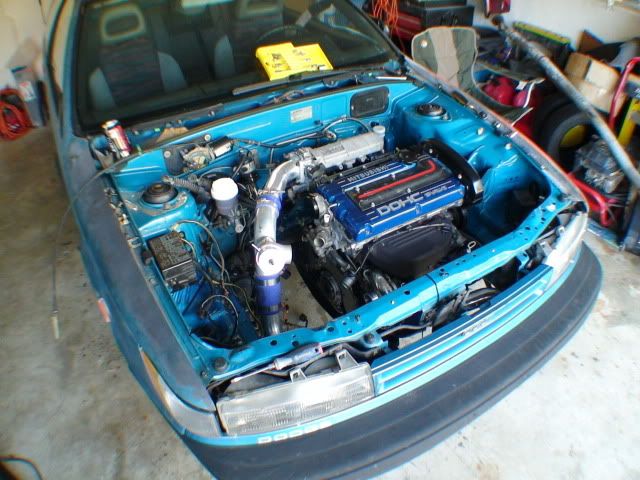
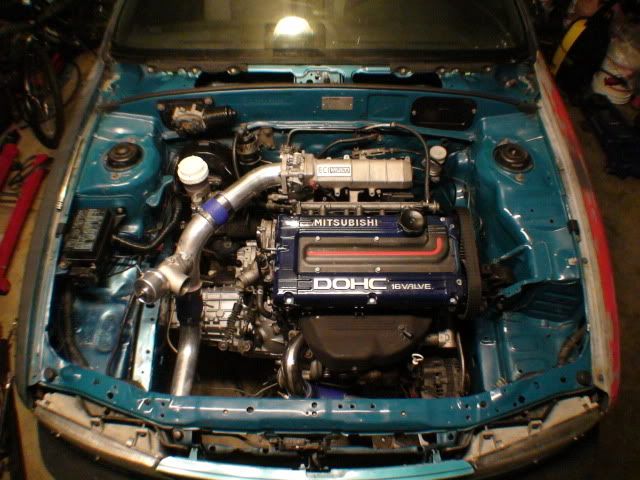
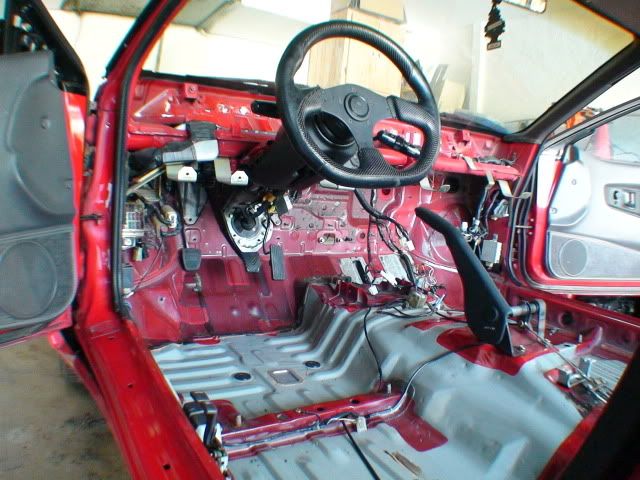
Okay now back to the tear down… I didn’t plan on pulling the dash out, but it had to be done in order to take out the A/C unit under the dash. No It isn't staying out, actually almost everything I have taken out is going back in. This car is actually going to have A/C, after all this is Florida. But it had to be removed so I could pull the wire harness and get it out of the engine bay. So here’s a walk through.

Started off with this(dash wise)

Image

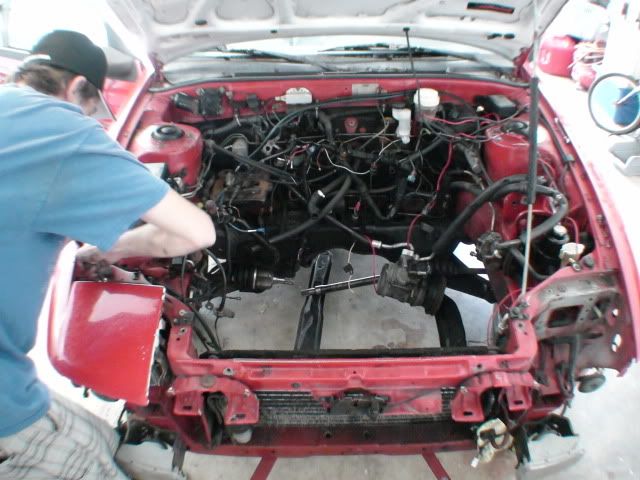
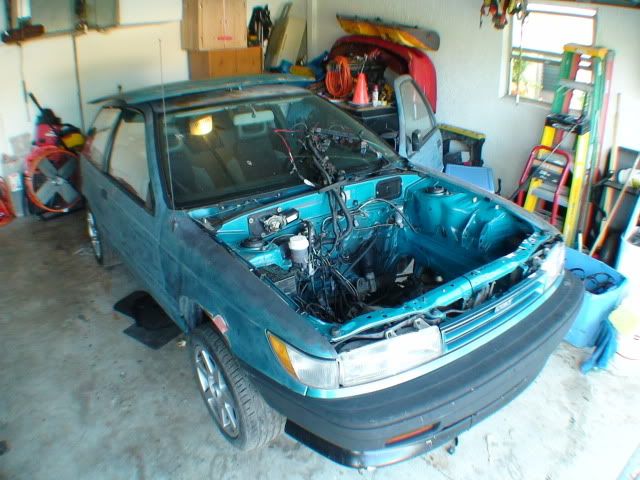
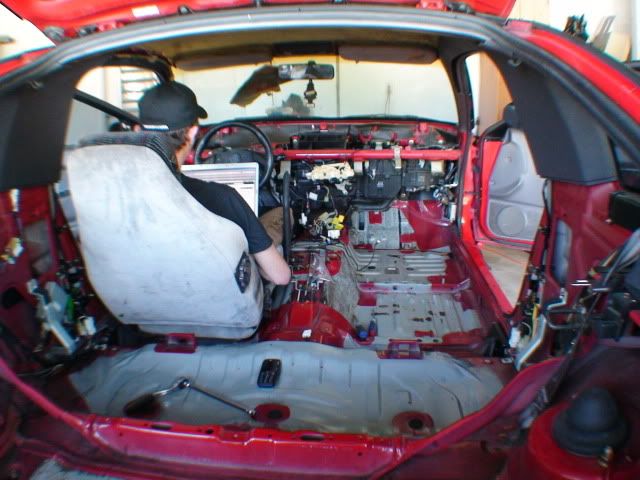
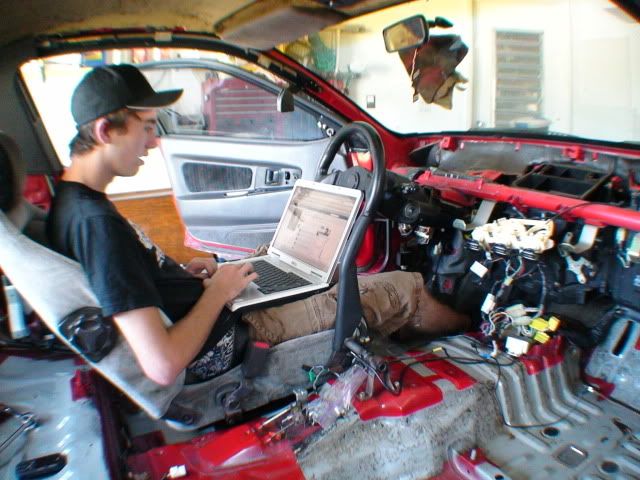
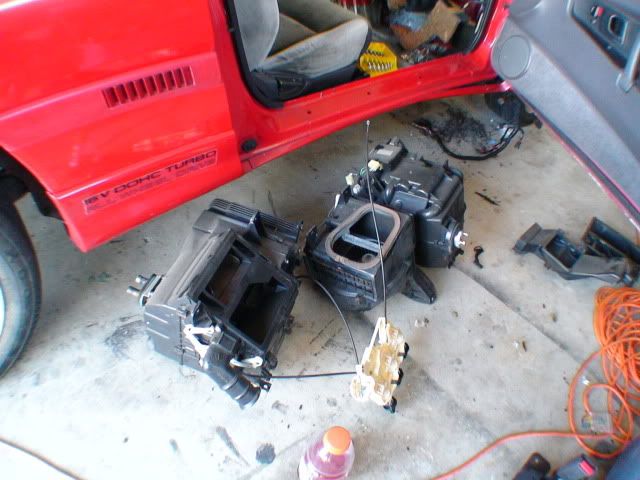
Got the actual dash out, then started taking out the A/C unit. As you can see, My buddy was hard at work…

Image

Image

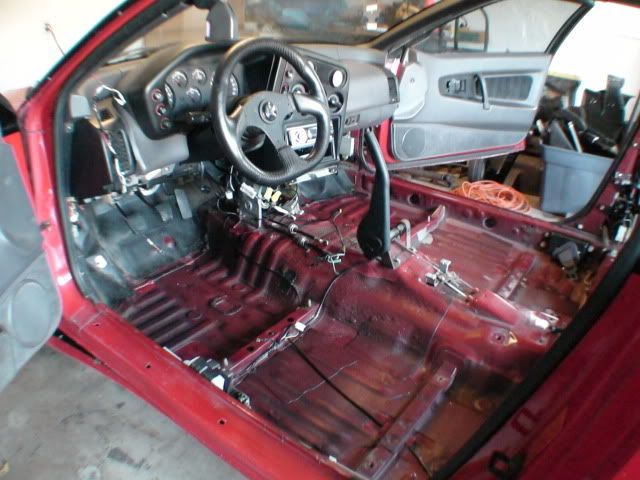
There was actually a rather heavy blanket behind it, on the fire wall, this weighed about 10-15lbs in itself. That was removed, along with all this…

Image

Image

Image

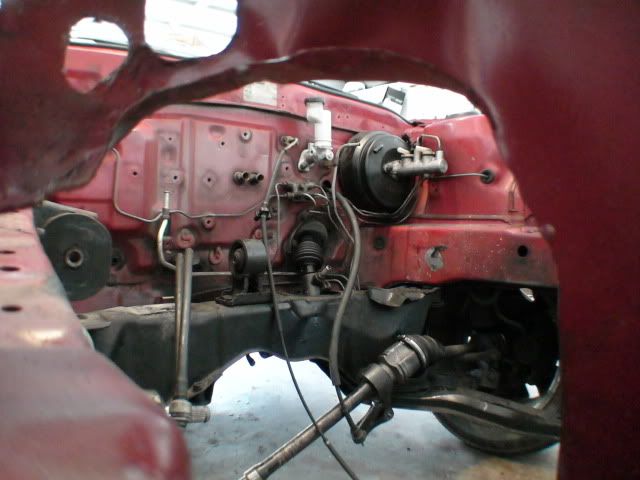
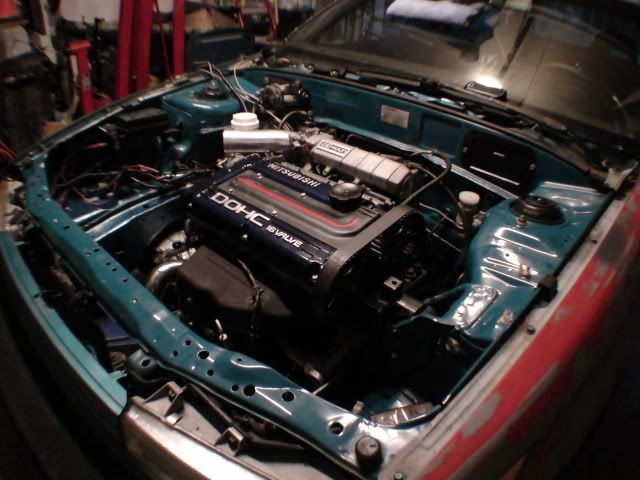
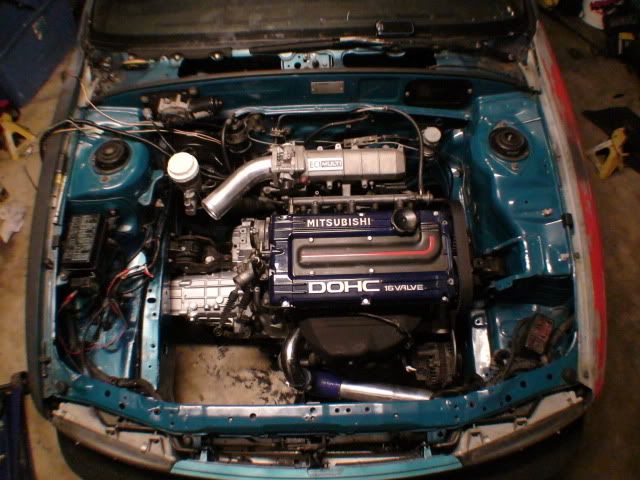
Then we removed the harness, clutch master cyl.,and the brake master and booster. Also removed the tranny mount that I forgot to remove earlier. And finished removing the brake lines, and fuel lines.

Image

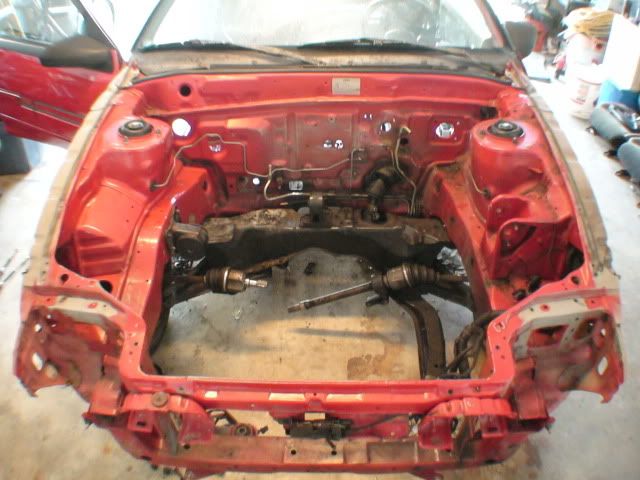
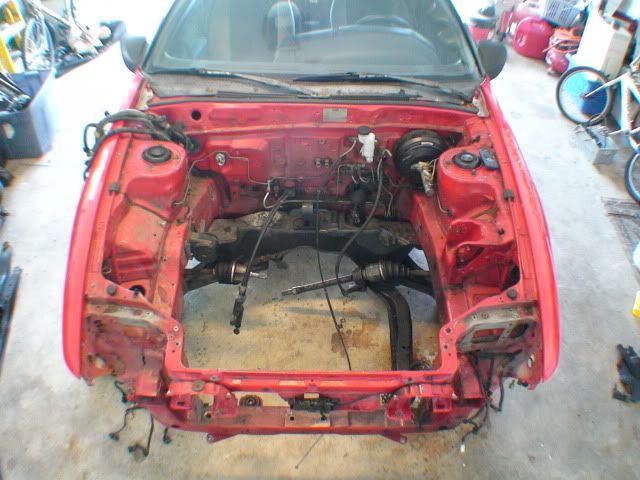
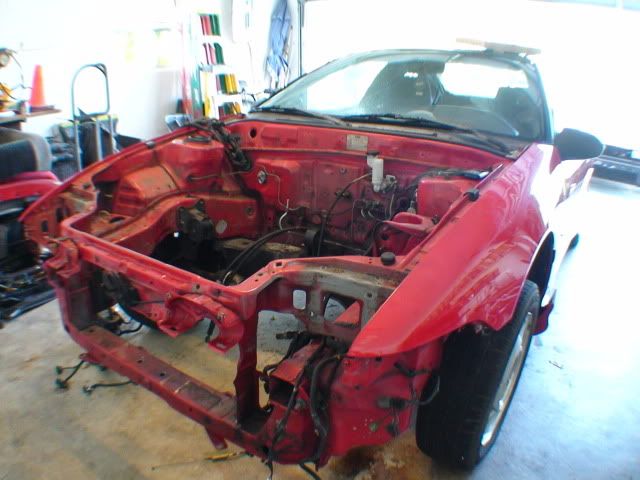
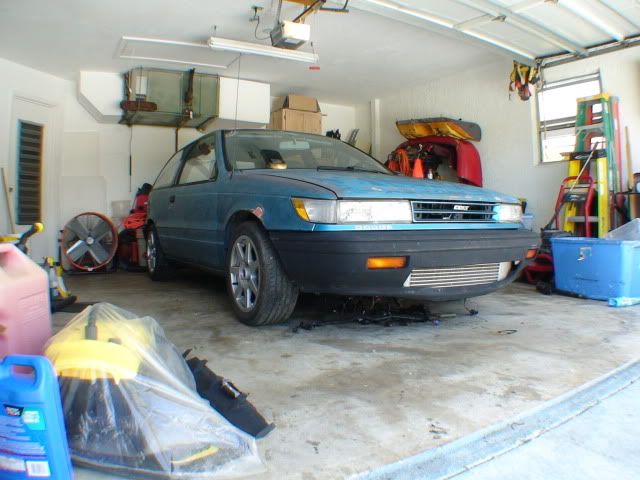
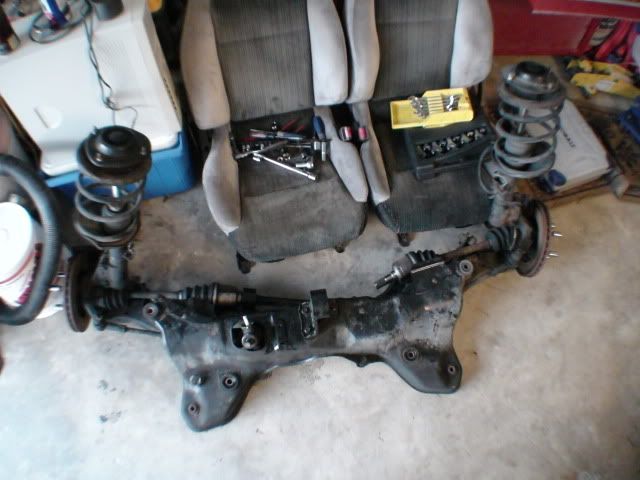
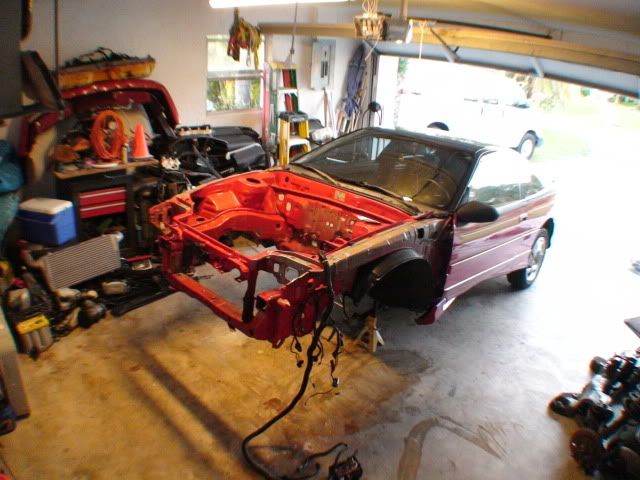
Then we rolled the car out into the driveway and cleaned the engine bay up good with simple green at a 1:1 ratio. Best cleaner to use before paint as it doesn’t leave any type of oils or anything. Then we rolled it back inside and removed the entire front sub-frame. At this point there is pretty much nothing left in the engine bay.

Image

Image

Image

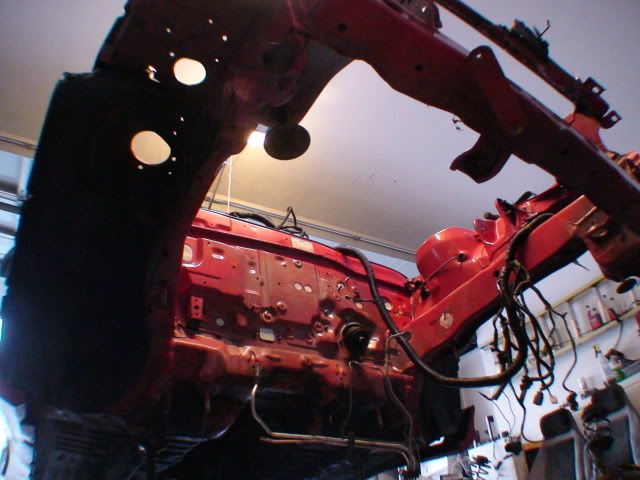
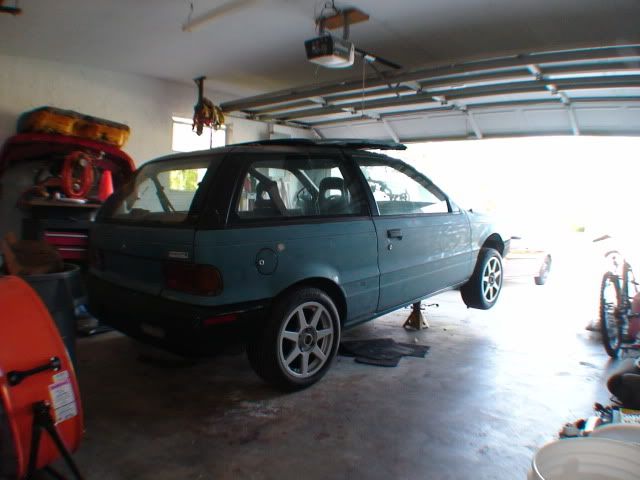
She is ready to start getting shaved, and prepped for paint! But as of right now the build is pretty much at a stand still until my friend brings his welder over so we can start shaving the bay. Then its time to paint!

Image

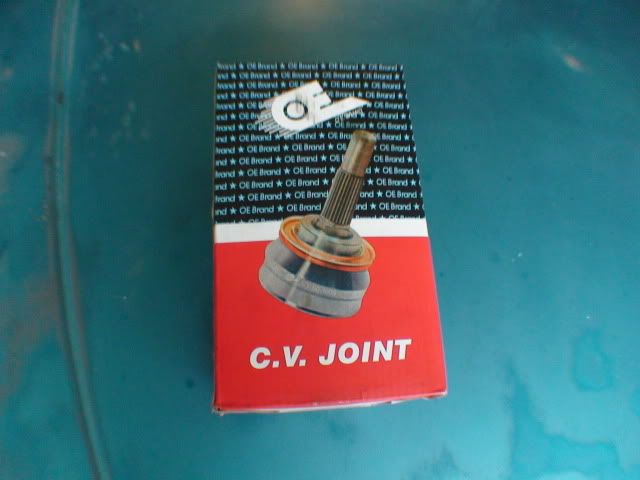
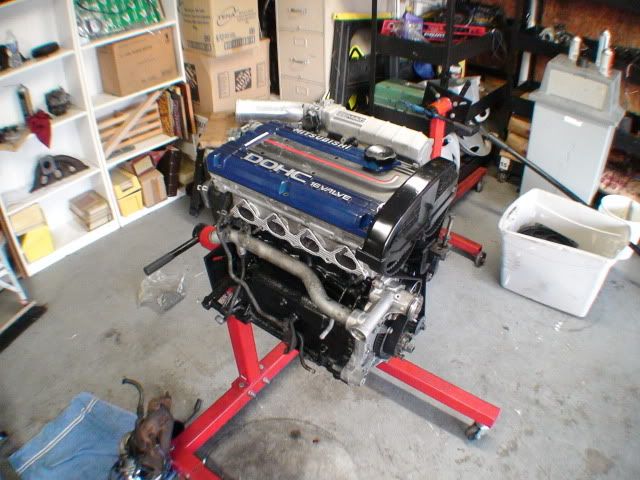
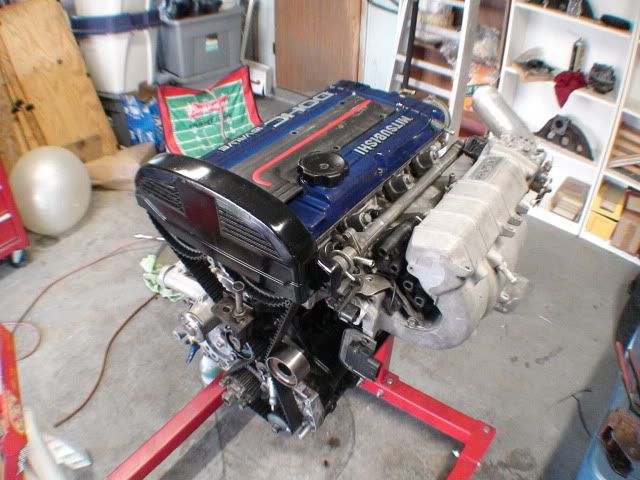
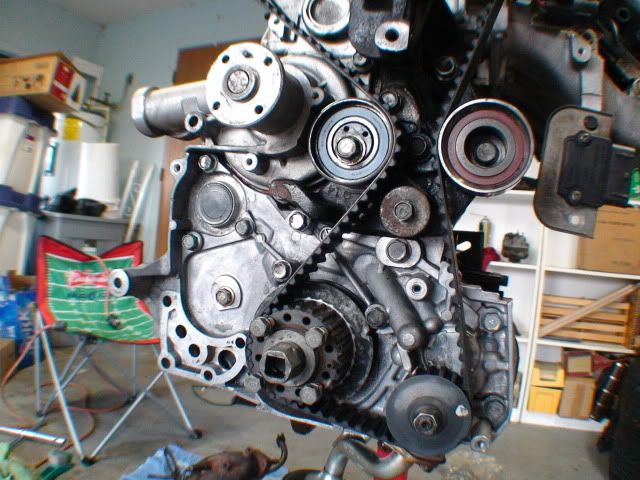
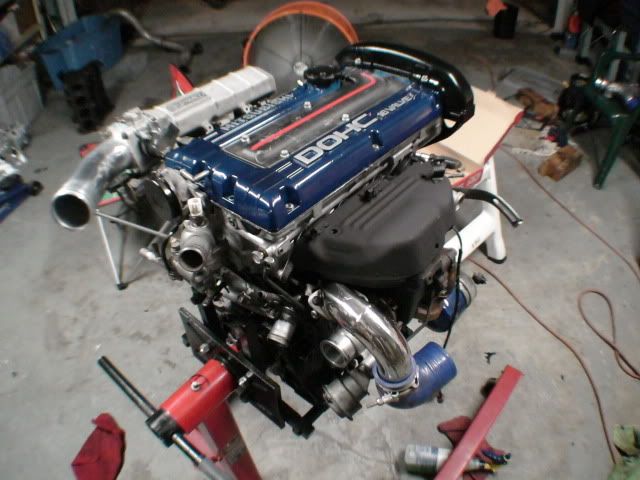
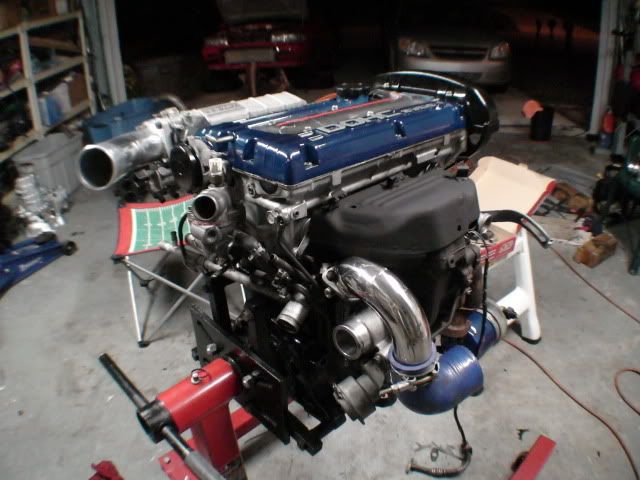
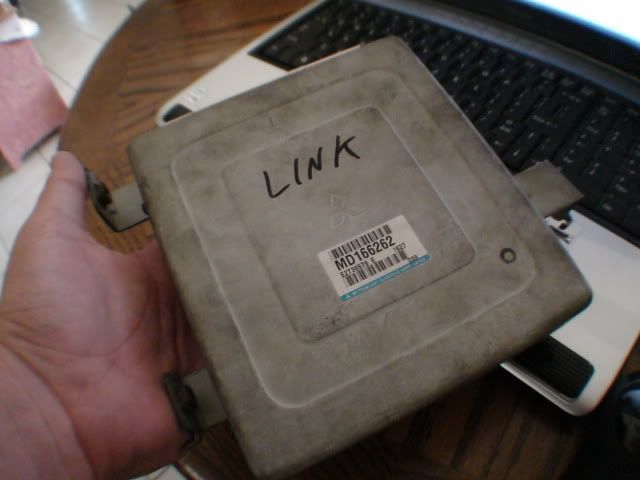
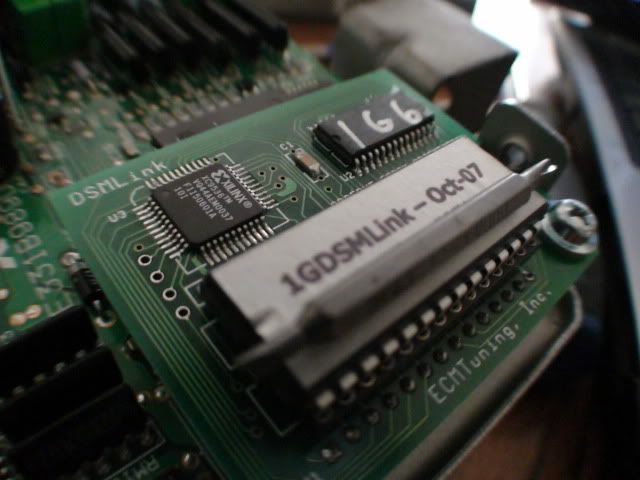
Oh yeah, I also scored a nice deal on a nice tuning setup ;)

Image

Image

Image

That’s it for now, I’ll update when I start shaving the bay. Hopefully I’ll document it enough so I can do a write-up on that too.

Later


Top
   
PostPosted: Mon Oct 19, 2009 12:23 pm 
Offline
Member

Joined: Sun Sep 07, 2008 6:30 pm
Posts: 150
Location: Cape Coral, FL
Lets get sidetracked…

Okay so last night I got a phone call from a guy I know asking me if I wanted to buy his car, which is a dodge colt with a 4g63 swap(phil you know about these ;) )for a rediculously cheap amount. I didn’t really want the car, but I would be stupid to not pick it up for the price he was offering. So later that night he showed up at my house with the car on a trailer. We rolled the talon out and onto the trailer and the colt into the garage. Now I know what your thinking, the answer is no. The talon is just at a different house, I didn’t get rid of it. I will be putting this car back together and driving it until it sells. But for the price im going to be sellig it for it will be sold very quick. Well here is the car, I already cleaned out the interior and a little bit in the bay. The car was getting sanded down for paint when he blew the motor, so that discouraged him and now he has a, awd talon lol so that’s why the outside looks the way it does. It is also rediculously dirty.

Image

Image

Image

Image

The car needs some work, of course. Like the bumper trimmed and put on correctly, going to remove the factory turbo model lip(sleeper status), and redo the wiring harness. But the car has no dents and the roof has none of the horrible rust spots most CSM’s have. And somehow it has leather back seats, which is kinda impossible because that wasn’t an option on these cars back then… here’s the inside, almost perfect besides the hatch area.

Image

Image

Image

Image

So that’s the car. I plan on doing a mini build thread in this one, afterall this car is going to help with the build of the talon. And sorry for the shitty pics. I have to buy and actual camera and stop using my 4.0MP video camera.

Should have a nice update tomorrow night or Sunday, does anyone in the cape have a honer I can use? The three prong thing to hone the cyl, I don’t know the proper name for it…


Top
   
PostPosted: Mon Oct 19, 2009 12:25 pm 
Offline
Member

Joined: Sun Sep 07, 2008 6:30 pm
Posts: 150
Location: Cape Coral, FL
Okay, sorry for the huge post all at once guys! Just wanted to get all caught up to present time... I will have an update later on tonight/tomorrow for the motor of the colt... Any questions or comments just post away!!


Top
   
PostPosted: Mon Oct 19, 2009 2:42 pm 
Offline
Member
User avatar

Joined: Fri Apr 03, 2009 11:03 am
Posts: 120
Location: NY; L.I.; (631)
Dry ice, eh?! :chin: Would've saved me carpal tunnel syndrome and some truly evil solvent fumes on a few projects... nice tip.

Good luck and skill on your project(s),
#89

_________________
#89


Top
   
PostPosted: Mon Oct 19, 2009 7:04 pm 
Offline
The happy administrator
User avatar

Joined: Tue Apr 20, 2004 3:20 pm
Posts: 5583
Location: Wisconsin
Great post. That is a TON of work you're doing to that talon. :o

_________________
Had a:
1991 Eagle Summit ES Hatchback - 4g15 12v 5spd
1991 Dodge Colt -4g15 12v 4spd
Have a:
1978 Oldsmobile Cutlass - 468BBO TH350
Round 3:
1990 Dodge Colt-4G63T 5spd


Top
   
PostPosted: Mon Oct 19, 2009 8:32 pm 
Offline
Member

Joined: Sun Sep 07, 2008 6:30 pm
Posts: 150
Location: Cape Coral, FL
Thanks guys! And yeah it is alot of work, But I figure if your gunna do it, then do it right!


Top
   
PostPosted: Tue Oct 20, 2009 1:26 am 
Offline
Member

Joined: Sun Sep 07, 2008 6:30 pm
Posts: 150
Location: Cape Coral, FL
Haven't really done too much the past week. Been busy working on a friends car and waiting on parts. Did get a motor though, just waiting on the gaskets and balance shaft elimination kit to come in... Also pushed the car out and washed it, and finiished cleaning the bay.

Image

Image

Also trimmed the bumper and removed the turbo front lip. Thinking about painting the IC black? should I?

Image

Then got the motor mostly put together, just need some gaskets and a few other small things.

Image

Image

Thats it for now, just waiting on parts then the motor/tranny will be in and she will be running!!!

Also in the middle of the engine build I painted mclovins new valve cover! I am very happy with how it came out!!

Image

Image

Hopefully there will be a decent sized update soon...


Top
   
PostPosted: Tue Oct 20, 2009 9:10 pm 
Offline
CSM Junkie
User avatar

Joined: Tue Sep 30, 2003 9:06 pm
Posts: 481
Location: Appleton, WI
Nice projects & progress so far.
But remember, thats a vinyl seat in the Colt, not leather. ;)

-Shawn


Top
   
PostPosted: Tue Nov 03, 2009 3:13 pm 
Offline
Member

Joined: Sun Sep 07, 2008 6:30 pm
Posts: 150
Location: Cape Coral, FL
All the little things are always what sets you back. Well the motor is finally almost together. I'd say about 95% done, but ready to be dropped in. First it was the Timing belt tensioner disappeared. So I ordered one, and when i picked up the new one I found two old ones. Then the 16g I had has a broken turbine fin. So I got a 14b and the pin for the wastegate broke off flush. So I had to fight with that for a few hours and it finally popped out. Figured that would be the last, but what a surprise, it wasn't. Now the water pipe I have, the coolant feed for the turbo is too small? I didn't think there was any difference but i guess there is. So now I need a water pipe and the motor will be 100% done. I'm starting to lose motivation to get it done for the meet this weekend, but I'm still gunna try. Well onto the pics.

I jacked up the car to drop the tank so I can install the WB255 and clean the tank, and I find this sweet exhaust setup

Image

Also got a few parts donated to me for the build. Got a valve cover that matches the car pretty well, Brand new axle boot, and a tranny.

Image

Image

Image

Image

I also cleaned up the tranny and painted it. But forgot to take pics, I will later on. Its not the best tranny but its free, so It will work. It shifted fine in the previous car, I know this for a fact because I drove the previous car. So I'm not too worried about it. I also tried replacing the axle boots. what a PITA!! I ended up breaking one of them. So now i gotta rebuild the one I have or find another one.

But I got the motor pretty much done

Image

Image

No balance shafts :yeas

Image

Image

Image

Here you can see Mclovins car in the background.

Image

Thats pretty much it for now, Been getting mclovins car together and ready for the meet, and My other buddy finch's Hatch Mirage together. I guess I'll post a few pics.

Mclovin's:

Image

Image

Finch's:

Image

Image

Image


They are who I will hopefully be cruising up to the EVO/DSM meet with. If my car isn't done then I'll just hop in with one of them.


Top
   
PostPosted: Fri Nov 06, 2009 2:12 pm 
Offline
Member

Joined: Sun Sep 07, 2008 6:30 pm
Posts: 150
Location: Cape Coral, FL
It's getting there, But yet still far away. Dropped the motor and tranny in, Tucked the harness as best I could. Probably the worst tuck I have done. The harness in this car is beyond fruit and banana up. Technically if the harness was good, I could throw some oil in and some DiaQueen and be done. But there are multiple wires separate from the harness that I don't know where they go. And I followed hem inside the car and I look under the dash and there are TWO separate engine harnesses. How that is possible is beyond me. So the next few days I am going to be in wiring hell trying to figure out what goes where. I might just buy a talon harness and just redo the whole harness swap. IDK, but its just annoying having to do seemingly un-necessary work because it wasn't done right the first time. And for some reason to me the engine bay looks terrible, it might just me but it doesn't look "clean" at all. Also, I don't know if anyone else has dropped a motor and tranny in by yourself. But don't! It sucks, having to run around with a chicken with its head cut off lowering and raising, twisting and turning the motor, lining up mounts. Let alone the fact that the only person you have to talk to is yourself, which gets a little old, and the neighbors may think your a little crazy... Well here are some pics.

Just the motor in.

Image

Image

Image

Pulled, well pushed the car out and turned it around and put the tranny on, TWICE... because I forgot to put on the throw-out bearing and fork... FML

Image

Image

Image

Image

My attempt at being artistic with my POS camera. Which BTW I have a good one now, so better pics from now on!

Image

As you can see, The car is not going to be done by tomorrow, and unless the oil feed comes in for the white hatch, then I won't be going to the meet. As for anyone that wanted to see the car. I will be up there in a few weeks so Hopefully the car will be done by then lol I'll keep everyone updated...

Time to go out and start going through the my worst nightmare, Meh atleast the weather is nice!


Top
   
PostPosted: Sun Nov 08, 2009 5:00 pm 
Offline
Member

Joined: Sun Sep 07, 2008 6:30 pm
Posts: 150
Location: Cape Coral, FL
Here's a short update. Did alot more wire tucking/fixing of the harness. Doesn't look like much but it took a long time to do lol

Here's a before and after pic from yesterday to see what I did. Cant see much but I got rid of alot of clutter, only two stray yellow wires are getting changed everything else is wired and ready to start. she came out pretty clean.

Before:
Image

After:
Image


Top
   
PostPosted: Mon Nov 09, 2009 2:39 pm 
Offline
Restricted Newbie
User avatar

Joined: Sat Aug 29, 2009 7:22 pm
Posts: 16
Location: Costa Rica
Nice work!!!!


Top
   
PostPosted: Mon Nov 09, 2009 5:48 pm 
Offline
2nd Banana
User avatar

Joined: Wed Dec 28, 2005 1:16 pm
Posts: 9369
Location: San Diego, CA.
Looks really clean man. I like the upper IC pipe.

_________________
91 GSX - 511fwhp and 352 lb/ft 25psi 110 octane, 7.68 @ 95.9mph 1/8th 21psi 91 octane, 11.93 @ 112.9mph, 117.7mph best trap speed, 20psi 91 octane
98 Volvo S70 T5 - DD

http://www.facebook.com/captaintonus


Top
   
Display posts from previous:  Sort by  
Post new topic  Reply to topic  [ 171 posts ]  Go to page 1 2 3 4 512 Next

All times are UTC-05:00


Who is online

Users browsing this forum: No registered users and 12 guests


You cannot post new topics in this forum
You cannot reply to topics in this forum
You cannot edit your posts in this forum
You cannot delete your posts in this forum
You cannot post attachments in this forum

Jump to:  
cron
Powered by phpBB® Forum Software © phpBB Limited