4g61t.org

Specializing in the 3g CSM
It is currently Mon Mar 18, 2024 9:05 pm

All times are UTC-05:00


Post new topic  Reply to topic  [ 171 posts ]  Go to page Previous 1 2 3 4 5 612 Next
Author Message
PostPosted: Sun Apr 25, 2010 9:07 pm 
Offline
Moderator
User avatar

Joined: Sun Mar 18, 2007 5:22 pm
Posts: 2430
Location: New Brighton, PA
Man this looks really good so far. I can't wait to see what the end result will be. BTW I live near Pittsburgh and my Colt's a 92. I DEFINATELY feel your pain about the whole rust issue...

_________________
2006 Pontiac Vibe 1.8L 1ZZFE 132HP
1997 Honda Civic EX Coupe 1.8L DOHC TURBO
Conner 6/23/09 8 lbs 3 ozs 20.5 inches
Caleb 3/17/12 8 lbs 15 ozs 20 inches


Top
   
PostPosted: Tue May 25, 2010 3:30 pm 
Offline
Member

Joined: Sun Sep 07, 2008 6:30 pm
Posts: 150
Location: Cape Coral, FL
Okay well I am in the middle of a battle. I took the block to a different machine shop. I get it back and throw it in my room. I pulled it out last night to start cleaning it and paint the block, and start assembling the bottom end. I start degreasing it. and I notice something in cylinder number one. It is still full of scratches from the stock pistons. So I am pissed about that. But then just for the hell of it, I go grab a piston. I slide it down the cylinder and the damn thing can move around like crazy. So I'm guessing That the machine shop didnt care to look at the specs i gave them, or measure the bore in the first place. I am going to be taking everything back to the machine shop and have them measure everything out in front of me. So Regardless I am going to need new pistons. Hopefully Josh@Import Image can Help me on that. And I am also going to need to sell my springs and retainers, The cams I am getting now are going to need a little more stiffness ;)

In the midst of all this, I finally finished painting the interior. It looks Great IMO. Now I gotta start putting it back together before I forget where everything goes! Here's how it turned out!

Image

Image

Image

So anyone looking for some 8.3:1 standard bore, 6 bolt Wiseco pistons or some BC springs and Ti retainers give me a pm!


Top
   
PostPosted: Tue May 25, 2010 7:06 pm 
Offline
Member

Joined: Sun Sep 07, 2008 6:30 pm
Posts: 150
Location: Cape Coral, FL
Got the interior harness All cleaned up. Threw the harness and misc. brackets back in. Maybe get the engine bay done Friday. Here's a few pics.

Image

Image


Top
   
PostPosted: Tue May 25, 2010 8:03 pm 
Offline
Moderator

Joined: Sat May 14, 2005 11:15 pm
Posts: 7515
Location: Stantonsburg, NC
Looks great man! Thats how you change the color on a car. I remember on my last colt I always regretted that I didn't tear it down completely to paint the interior. I just painted the door jambs and the engine bay.

Sucks on the machine work. I think I would just chalk it up as a loss and find another shop all together and not even bother taking it back to them.

_________________
93 Mitsubishi Expo LRV 1.8/manual
95 Eagle Summit DL Coupe 1.5/manual
01 Mitsubishi Mirage ES Sedan 1.8/manual


Top
   
PostPosted: Wed Jun 02, 2010 5:59 pm 
Offline
Member

Joined: Sun Sep 07, 2008 6:30 pm
Posts: 150
Location: Cape Coral, FL
Got the engine bay all sanded, degreased, sanded again, degreased again. Then I wiped everything down with wax and grease remover, twice. Then primed. Feels good to see it all one color again lol even if it is just primer.

Image


Top
   
PostPosted: Sun Jul 04, 2010 2:12 pm 
Offline
Member

Joined: Sun Sep 07, 2008 6:30 pm
Posts: 150
Location: Cape Coral, FL
Its has been quite a while since I have been able to do anything to the car. These past few weeks have been hell with a death in the family, taking a week off to take care of all that. The having to work like hell to get caught back up from my week off. But any chance I get I go out and work on the car.

I got sick of looking at all the interior pieces scattered around the garage so I decided to start putting that back in. But me being the geniuos I am I just threw everything anywhere there was room and didn't cover any of it. So all this painting I have been doing has everything covered on overspray. So each individual piece has to be cleaned up alot. So that has taken up alot of time.


Image

Image

From the rear seats back is all in.

Image

And with my great luck lately when I was removing the tape from the rear quarter windows, the tint on the drivers side decided to come off with it...

Image

I finally got my new(again) pistons in. decided to upgrade to the 1400HD's and bump up the compression to 9.0:1 since the block had to be bored .020 over.

Image

So I brought them to the machine shop the day I got them so they could finish up the block.


My Badass TiAL Keychain finally showed up after being on back order for about 2 months!

Image

Image


I also ordered a new oil pan from STM since they were having a special. when you order a new oil pan it comes with a new bolt kit. I also got the water pump bolt kit they had too

Image

Also got the hookup(Free) on some brand new front control arms! So I threw the front poly bushing in em and they are ready to go!

Image

Image

Got the block back from the machine shop. Cleaned it up and painted it with some gloss black engine paint, and threw in the new freeze plugs.

Image

Image

Brought it in my room and a few days later got around to checking the main bearing clearances, which checked out perfect! Installed the oil squirters, and now she sits waiting for the ring filer...

Image

Image

Image

Image

Also, I am thinking of painting the intake manifold black. Since the engine bay colors are going to be white and black with gold accents. I think the aluminum intake manifold is going to throw it off. Corey from STM painted his black and I really like it! LMK what you guys think.

Image

Image


Top
   
PostPosted: Mon Jul 05, 2010 2:09 pm 
Offline
Member

Joined: Sun Sep 07, 2008 6:30 pm
Posts: 150
Location: Cape Coral, FL
Picked this up last night from Josh@Import Image Racing! :D

Image


Top
   
PostPosted: Wed Jul 28, 2010 7:48 pm 
Offline
Member

Joined: Sun Sep 07, 2008 6:30 pm
Posts: 150
Location: Cape Coral, FL
Well it's been a few weeks so I guess I will fill everyone in on what I have done.

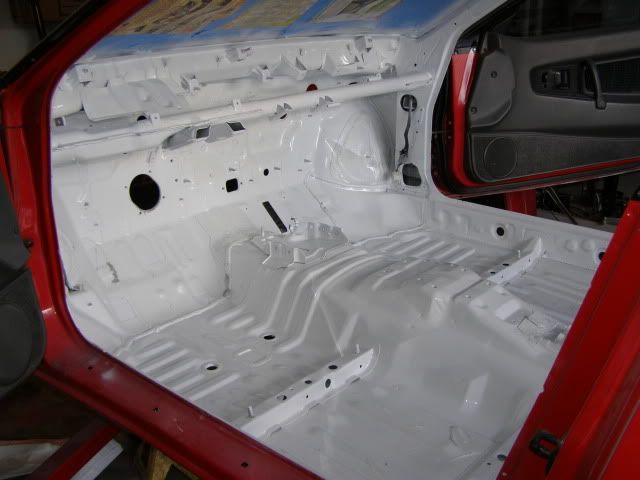
Sanded down the entire engine bay again, and sprayed the last coat of primer. No pics of that though. kinda boring.

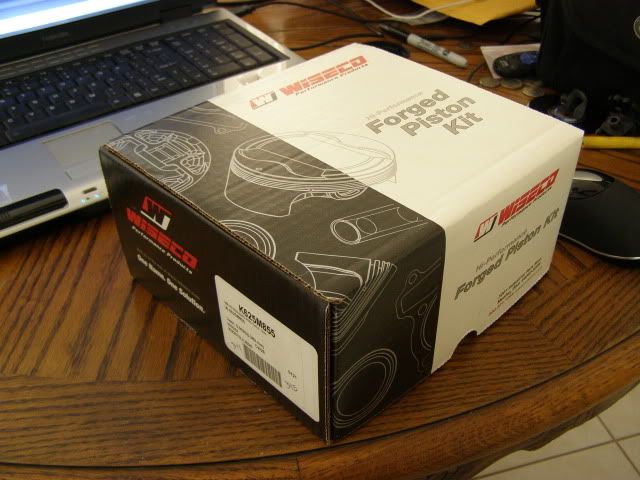
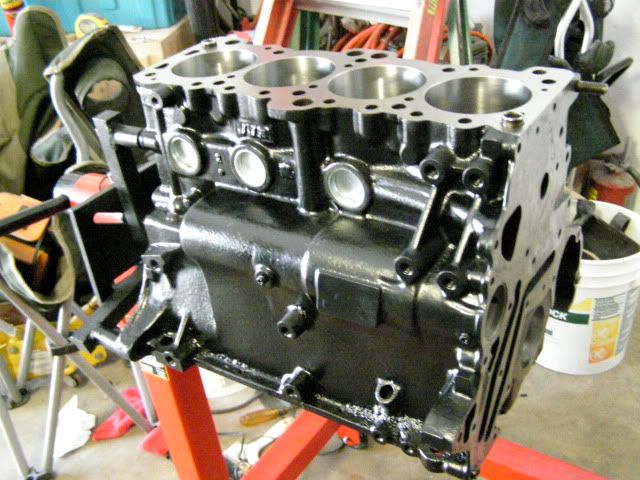
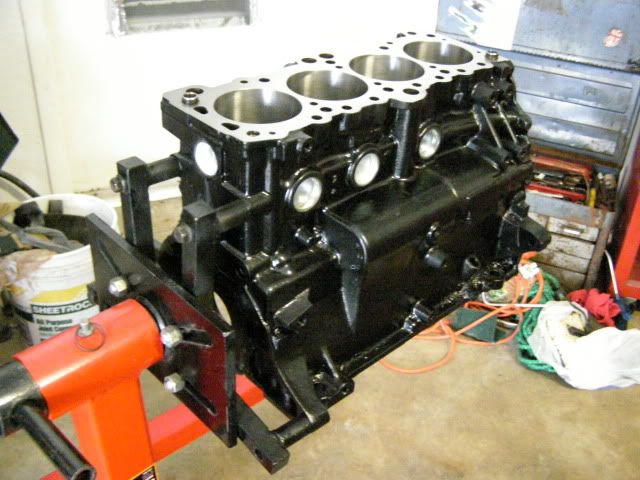
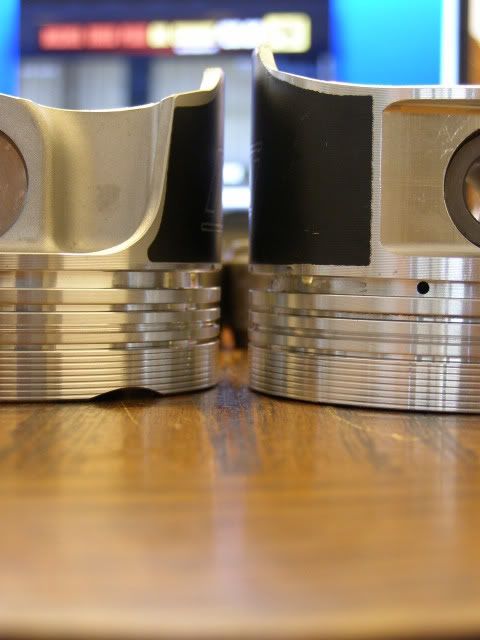
Got the pistons on the rods. Being able to have standard wiseco's next to the 1400hd's definatley makes me happy I upgraded. They are two completely different pistons. night and day. Here's a few pics of everything.


Here you can see the difference in the wrist pins.
Image


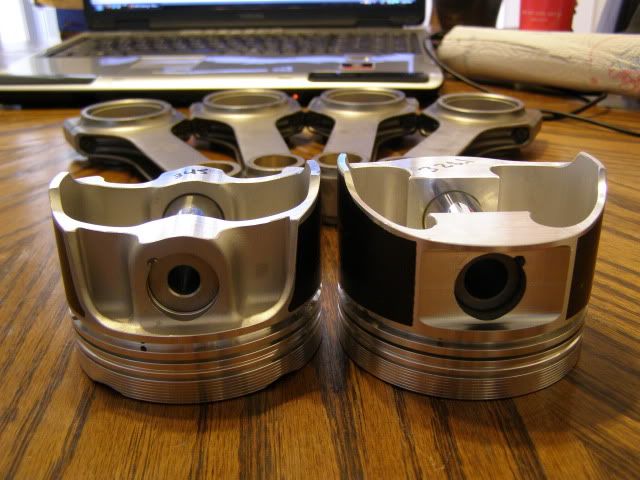
As you can see the skirt design is completely different. Alot more material added for strength. but as you can see its also added weight =/
Image


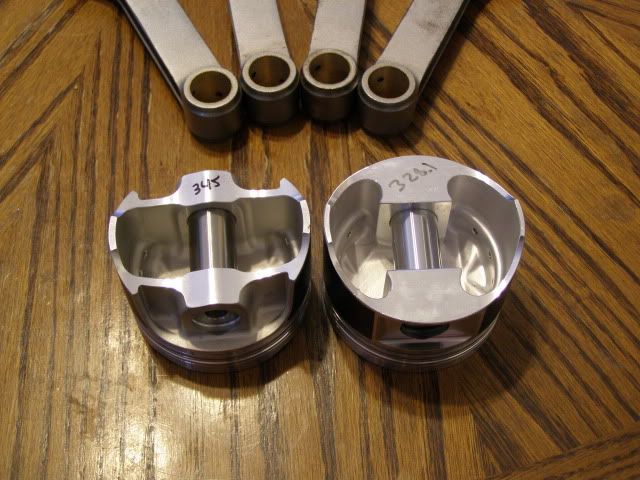
And here it's kinda hard to tell. but the top ring land is actually thicker. as well as the larger valve reliefs for oversized valves and very large cams ;)
Image

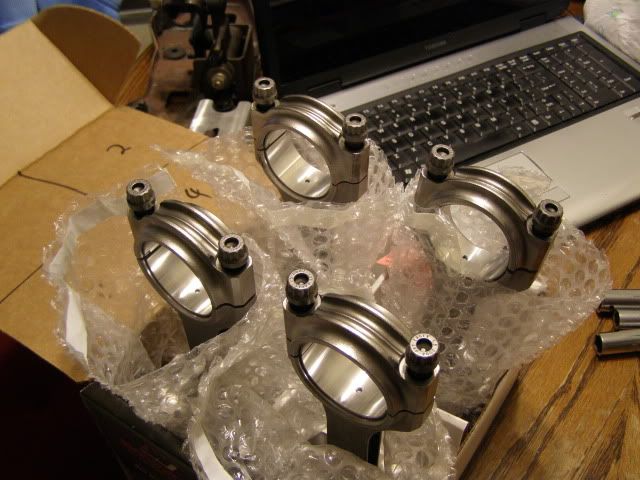
All together ready to go in!
Image

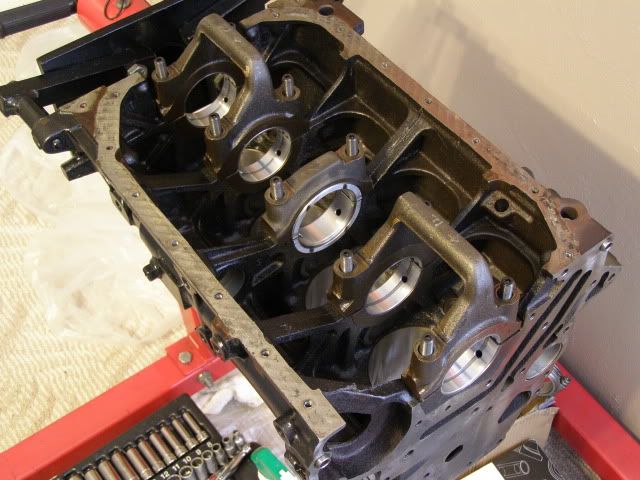
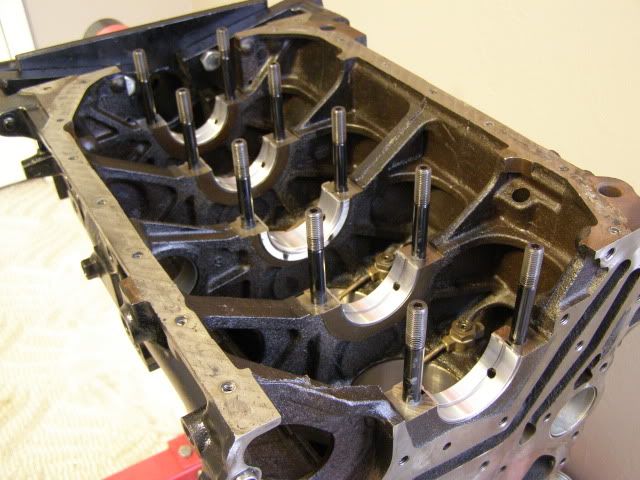
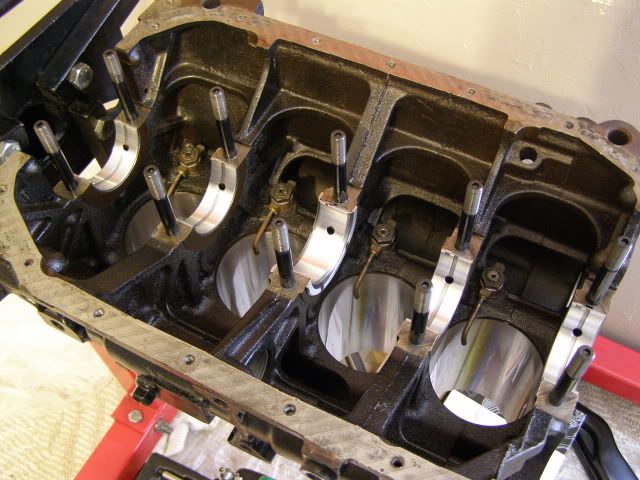
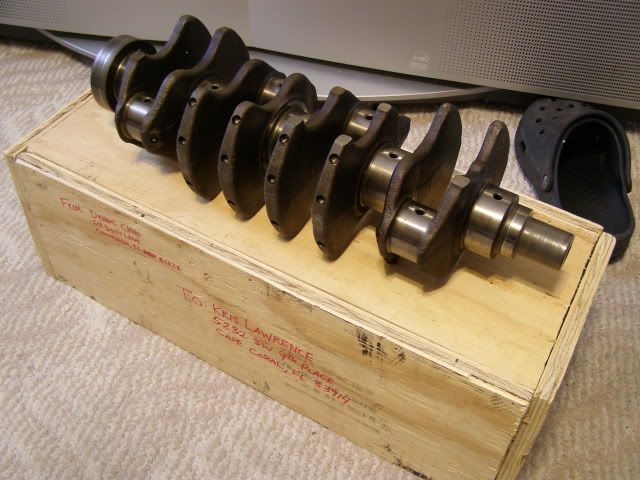
Got the crank in the motor as well. Everything was perfect, got the rings all filed to what I wanted them at. Threw the pistons and rods in to check rod bearing clearances. Tighten them to spec, loosen them. Go to take them out, and cyl #1 rod cap is stuck... I was confused and had a hell of a time getting it off.

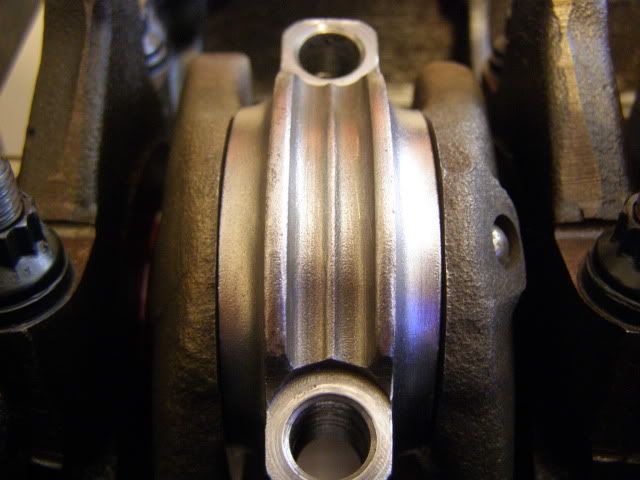
Turns out the crank is messed up. Here are some pics. The #1 rod journal is weird, the side walls hit the rod cap on the edges, But only on the outside of the crank. The cap can rotate around the journal fine till it gets to the outside. I have tried every rod/cap and the all do it on this cyl. I havent got a straight answer as to what caused this but anyone with a theory please lmk.

Here's a good journal for comparison.

Image

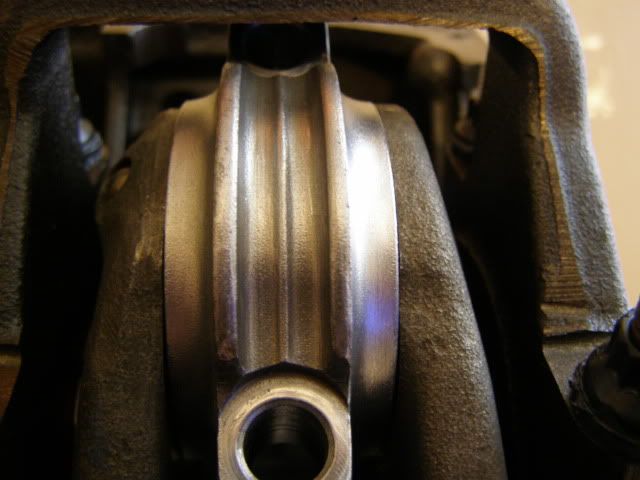
And here is the bad journal.

Image

I have more detailed close up pics if anyone wants to see.

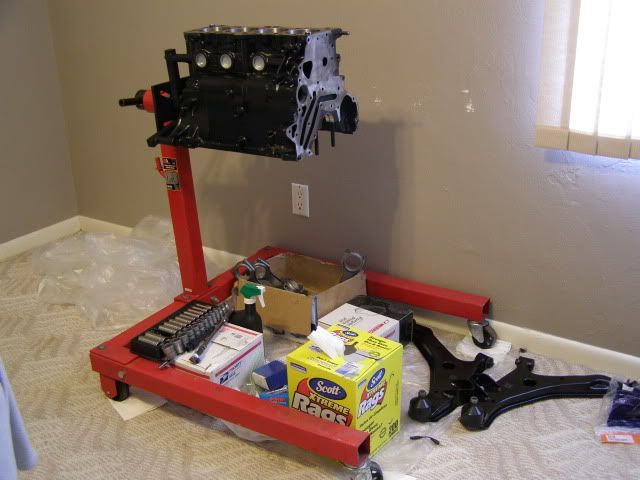
Needless to say, this has me pretty well p***** off. So I haven't touched the car until tonight. And all I did was take the crank out and put it in a bag.

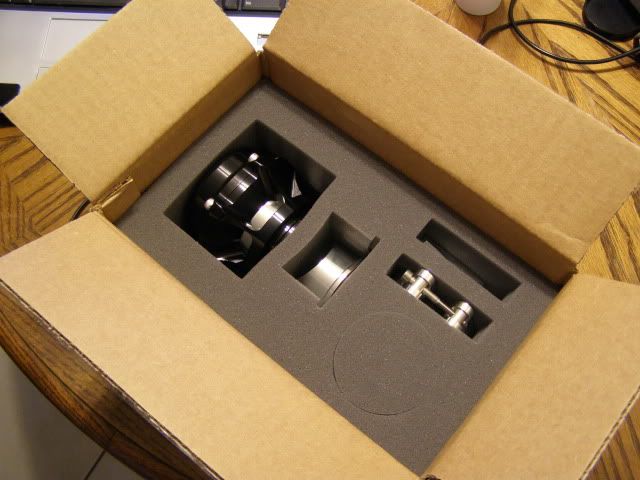
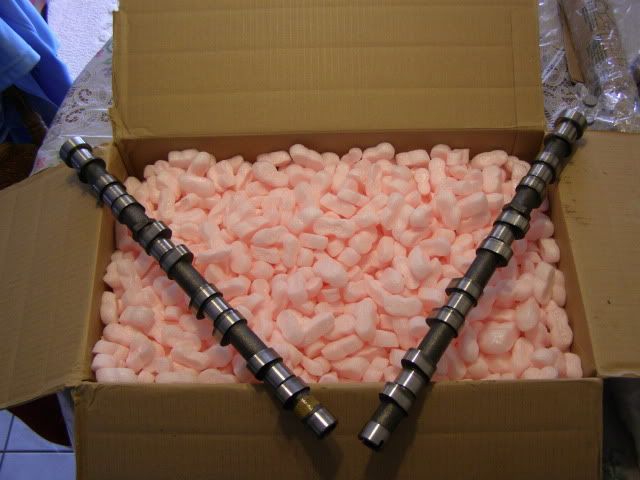
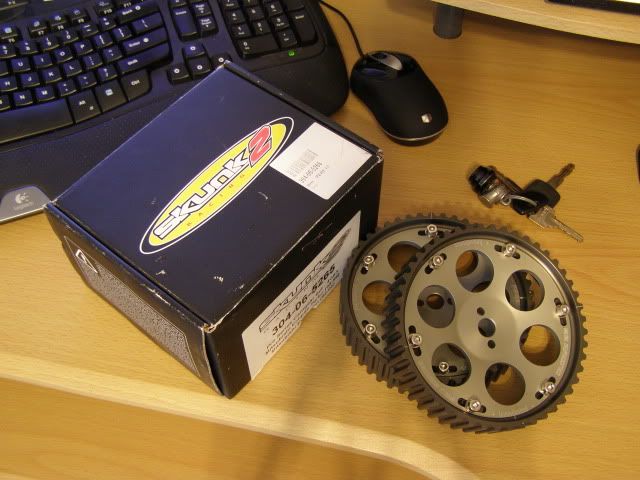
But I have ordered a few goodies. I got some Cam gears. I bought Skunk2's mainly because I don't want "blingy" cam gears. these are plain and I like the design.

Image

There are a few other things on their way as we speak. But I will wait till they get here to "release" what they are to the public. lol

Hopefully tomorrow or Friday I will be able to stop by the machine shop and see what they have to say about the crank...

I'll be sure to post pics of the new stuff when it comes in.


Top
   
PostPosted: Mon Aug 09, 2010 6:46 pm 
Offline
Member

Joined: Sat Jun 06, 2009 12:42 am
Posts: 45
Location: running springs
Very nice build man cant wait to see it complete.

_________________
1989 mirage gt (drag car in progress)


Top
   
PostPosted: Wed Aug 11, 2010 3:37 pm 
Offline
Member

Joined: Sun Sep 07, 2008 6:30 pm
Posts: 150
Location: Cape Coral, FL
Bought new wheels... again.

Teaser:

Image


Top
   
PostPosted: Fri Aug 20, 2010 11:47 am 
Offline
Spends Too Much Time Under The Hood
User avatar

Joined: Wed Jun 22, 2005 11:03 am
Posts: 253
Location: Auburn, AL
Eagle rods? I've heard of people having clearance issues with the big-end. Did you check the rod vs. the specs? My buddy had to hand-lap his before he installed them to get them within spec.

_________________
2003 Evo, 89 Mirage Turbo, 88 Conquest 4G64


Top
   
PostPosted: Sat Aug 21, 2010 12:54 pm 
Offline
CSM O.G.

Joined: Wed Jul 16, 2003 1:46 am
Posts: 862
Location: Albany, Or, U.S.A.
^ its funny that all the other cps fit on their respective rods fine but not on this one, so my thinking is it was the crank that was ground wrong.

I like FD wheels on a DSM, good choice

~


Top
   
PostPosted: Sun Aug 22, 2010 3:05 pm 
Offline
Member

Joined: Sun Sep 07, 2008 6:30 pm
Posts: 150
Location: Cape Coral, FL
Quote:
Eagle rods? I've heard of people having clearance issues with the big-end. Did you check the rod vs. the specs? My buddy had to hand-lap his before he installed them to get them within spec.
Yes they are Eagles. But it isn't the rods as the same end cap will fit fine in the other journals but hits on the one. I tried every cap in every journal, and they all hit on the same journal. New crank is on its way.

I have to order the kiggly's here soon so I can get the head to the machine shop. And the crank to be polished and checked.


Top
   
PostPosted: Sun Aug 22, 2010 3:08 pm 
Offline
Member

Joined: Sun Sep 07, 2008 6:30 pm
Posts: 150
Location: Cape Coral, FL
Almost forgot about these guys... ;)

Image

Kelford 280's. Badass!


Top
   
PostPosted: Thu Aug 26, 2010 4:57 pm 
Offline
Member

Joined: Sun Sep 07, 2008 6:30 pm
Posts: 150
Location: Cape Coral, FL
New cranks here. Hopefully drop by the machine shop tomorrow. A new machine shop..

Image


Top
   
Display posts from previous:  Sort by  
Post new topic  Reply to topic  [ 171 posts ]  Go to page Previous 1 2 3 4 5 612 Next

All times are UTC-05:00


Who is online

Users browsing this forum: No registered users and 13 guests


You cannot post new topics in this forum
You cannot reply to topics in this forum
You cannot edit your posts in this forum
You cannot delete your posts in this forum
You cannot post attachments in this forum

Jump to:  
cron
Powered by phpBB® Forum Software © phpBB Limited