4g61t.org

Specializing in the 3g CSM
It is currently Mon Mar 18, 2024 9:46 pm

All times are UTC-05:00


Post new topic  Reply to topic  [ 171 posts ]  Go to page Previous 1 2 3 4 512 Next
Author Message
PostPosted: Tue Mar 30, 2010 8:16 pm 
Offline
Member

Joined: Sun Sep 07, 2008 6:30 pm
Posts: 150
Location: Cape Coral, FL
Cars on jackstands. Front sub frame is pulled out. Fuel and brake lines are out of the way. Just gotta do a little more work on the bay and she will be ready for paint.

Image

There is also a nice new addition to the engine bay on its way as we speak ;)


Top
   
PostPosted: Tue Mar 30, 2010 11:24 pm 
Offline
Spends Too Much Time Under The Hood
User avatar

Joined: Tue Dec 08, 2009 12:58 am
Posts: 351
Location: 48205
I seen your colt and talon on dsmlink! Bad ass projects man!

_________________
|e85|HKS 272's|BC Springs|Evo 3 16g|V3 w/SD|TiAL MVS 38mm on stock 2g mani|3" o2 Eliminator|Jay Racing Alt. Relocation Kit|FIC 2150cc's|255hp|


Top
   
PostPosted: Sun Apr 04, 2010 8:55 pm 
Offline
Member

Joined: Sun Sep 07, 2008 6:30 pm
Posts: 150
Location: Cape Coral, FL
Quote:
I seen your colt and talon on dsmlink! Bad ass projects man!
Thanks man!

Look what finally showed up today!!!!=D

Image

Image

Precision billet wheel 6265 w/S cover ;)


Top
   
PostPosted: Mon Apr 05, 2010 6:35 am 
Offline
Spends Too Much Time Under The Hood
User avatar

Joined: Tue Dec 08, 2009 12:58 am
Posts: 351
Location: 48205
yum :)

_________________
|e85|HKS 272's|BC Springs|Evo 3 16g|V3 w/SD|TiAL MVS 38mm on stock 2g mani|3" o2 Eliminator|Jay Racing Alt. Relocation Kit|FIC 2150cc's|255hp|


Top
   
PostPosted: Fri Apr 09, 2010 1:06 pm 
Offline
Member

Joined: Sun Sep 07, 2008 6:30 pm
Posts: 150
Location: Cape Coral, FL
Okay so the rear bumper, tail lights, gas tank, and rear sub-frame are out now. I am kind of up set at the rust in the rear. Its not anything bad really i just didn't think the car had any! But the rear bumper was completely rusted through. So That isnt going back in. But everything else in good. I am undecided if it is even worthe it to throw the three bolt rear end in since i know for a fact it is going to break. But I might just out it in and refinish a 4 bolt while i break in the car. Who knows, cuz i sure don't. didnt take too many pictures but here are a few.

Heres what used to be the rear bumper. Almost every bolt was rusted so much that the socket didnt fit anymore. and the few that weren't just sheared off instantly. I can't Imagin trying t work on a northern car!

Image

Image

Gas tanks out

Image

Rear sub-frame is out!

Image

Image

Image


Top
   
PostPosted: Sun Apr 11, 2010 11:10 am 
Offline
Member

Joined: Sun Sep 07, 2008 6:30 pm
Posts: 150
Location: Cape Coral, FL
UPDATE!!

Got some more parts. I only have one picture because they are out in my car and it is pouring out. but here's a shitty pic...

Image


Top
   
PostPosted: Sun Apr 11, 2010 8:48 pm 
Offline
Member

Joined: Sun Sep 07, 2008 6:30 pm
Posts: 150
Location: Cape Coral, FL
Got bored today, Here are some more pictures...

Image

Image

Image

Image

Image

Image


Top
   
PostPosted: Tue Apr 13, 2010 2:53 pm 
Offline
Member

Joined: Sun Sep 07, 2008 6:30 pm
Posts: 150
Location: Cape Coral, FL
Painted ONE wheel lol heres some pics. It came out really good IMO

Image

Image

Image

Now back to the garage for some more painting!!


Top
   
PostPosted: Tue Apr 13, 2010 5:39 pm 
Offline
Member

Joined: Sun Sep 07, 2008 6:30 pm
Posts: 150
Location: Cape Coral, FL
More painting done. I painted probably 1/2 the underneath of the car today. Just have to clean the other half where the gas tank goes and the rear sub-frame and get another can or two of paint. But what is done so far looks SOOOOOO much better. See for yourself...

Image

Image

Image


Top
   
PostPosted: Wed Apr 14, 2010 7:52 pm 
Offline
Member

Joined: Sun Sep 07, 2008 6:30 pm
Posts: 150
Location: Cape Coral, FL
Under body of the car is DONE! Finished the rear half of the car today. I love how it turned out. Can't wait to see the whole car when its painted now!! I think on my day off I am going to start stripping the inside of the car so I can get that done... idk though. Any who, here's the finished product!

Image

Image

Went from this:

Image

To THIS!!!!!!!! :D

Image


Top
   
PostPosted: Wed Apr 14, 2010 10:50 pm 
Offline
Member

Joined: Sun Sep 07, 2008 6:30 pm
Posts: 150
Location: Cape Coral, FL
Can this get moved to the new builds section please :D


Top
   
PostPosted: Thu Apr 15, 2010 7:05 pm 
Offline
Moderator

Joined: Sat May 14, 2005 11:15 pm
Posts: 7515
Location: Stantonsburg, NC
Quote:
Can this get moved to the new builds section please :D
Done! Great work BTW. 8)

_________________
93 Mitsubishi Expo LRV 1.8/manual
95 Eagle Summit DL Coupe 1.5/manual
01 Mitsubishi Mirage ES Sedan 1.8/manual


Top
   
PostPosted: Tue Apr 20, 2010 9:49 am 
Offline
CSM Junkie
User avatar

Joined: Mon Jul 05, 2004 10:59 pm
Posts: 654
Location: AB Canada
Updates?


Top
   
PostPosted: Wed Apr 21, 2010 6:33 pm 
Offline
Member

Joined: Sun Sep 07, 2008 6:30 pm
Posts: 150
Location: Cape Coral, FL
Quote:
Updates?
Nothing to good. Been working alot, trying to let my bank account recover ;) But I did do a little bit today.

Cleaned the rear sub-frame and gas/brake lines with the pressure washer. Painted another wheel. The other two still have to be stripped, and the lips sanded to the right finish. I also had a cracked valve cover that I decided to shave. I figured I might as well mess up something that was already messed up before I use my good one. Came out almost perfect. And wasn't as hard as everyone says. But there are a few spots I could have done better. I primed it, painted it, then stuck it in the oven to cure it. A few bits of dust go in the paint while it was drying but it came out good. Especially for a mock-up valve cover ;)

Image

Image

Image

Here you can see there are no dips or anything even hnting there used to be letters there.

Image

And these are the little black pieces that floated onto it when it was drying. Thankfully they stayed on the inside of the spark plug area.

Image


It was easy enough that I may start shaving valve covers and selling them.

Thats it. I will be off friday(fingers crossed) so I will be sandblasting the rear subframe and painting it. nothing crazy but i cant have rusty parts going back under the nice white car ;).


Top
   
PostPosted: Sun Apr 25, 2010 5:59 pm 
Offline
Member

Joined: Sun Sep 07, 2008 6:30 pm
Posts: 150
Location: Cape Coral, FL
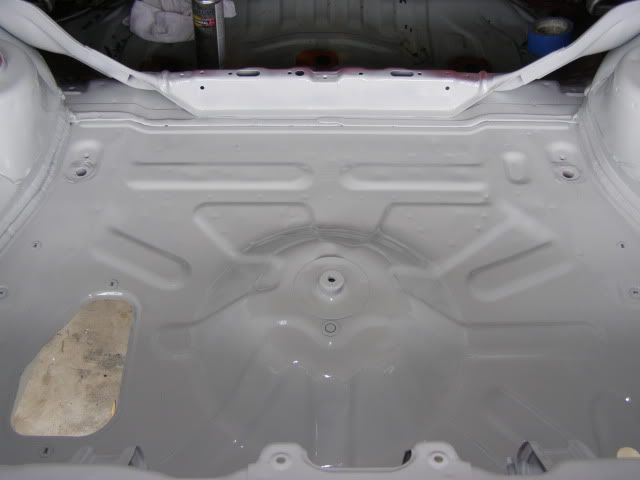
Alright I guess its time for a small update. I was feeling pretty lazy today so I didn't do much to the car. But for some reason I felt like painting the interior. So I went out and start removing everything from the back seat, back. I didn't take any picture of the rear stripped but oh well. Sorry =/. I then sprayed everything with simple green and cleaned it up really well. then sprayed it again and went it it with some 400 grit to rough it up a little and clean as i went. Then I went and got some more of the white that I used for the under body and started going at it. Let me tell you, this was the most awkward, annoying thing I have done so far. All of the little holes, brackets, and weird angles that you have to do to get everything.

Yes, the car is getting full interior so I could have just done the floor and be done with it. but, like I have said. I don't want anyone to be able to tell the car was originally red. So EVERYTHING has to be done. Plus later on when/if it turns into a track car or just not a daily driver. It wont look ugly when I strip it down to its birthday suit. With that said, I know you all wanna see pics...
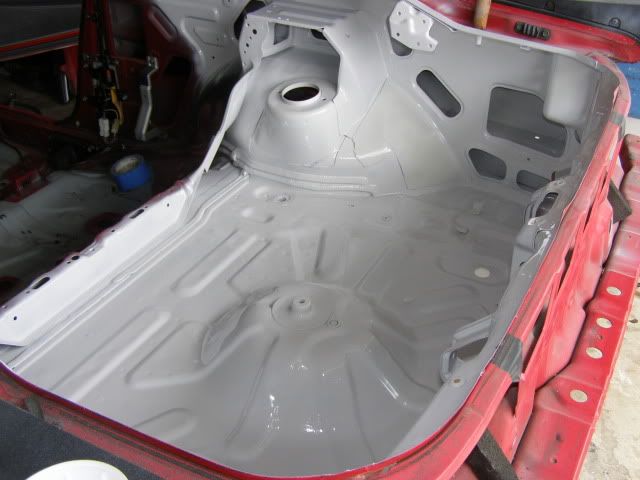
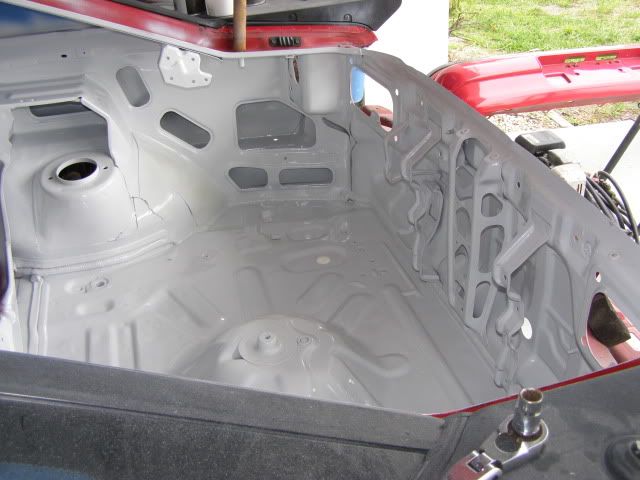
Image

Image

Image

And FYI the red you see at the top of the rear is not red paint. it is the reflection of the red hatch in the glossy white hotness.
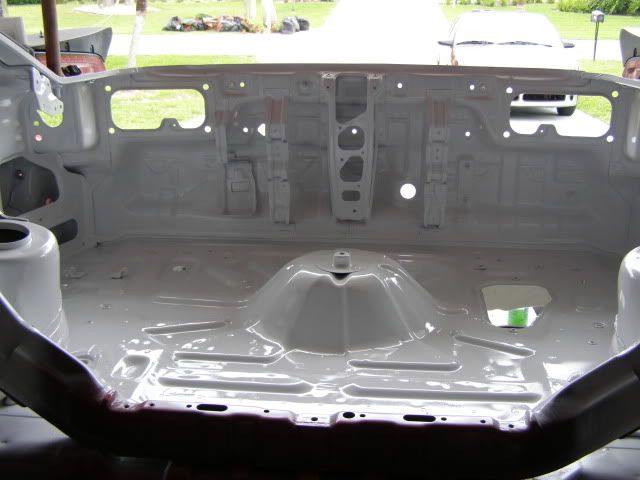
Image

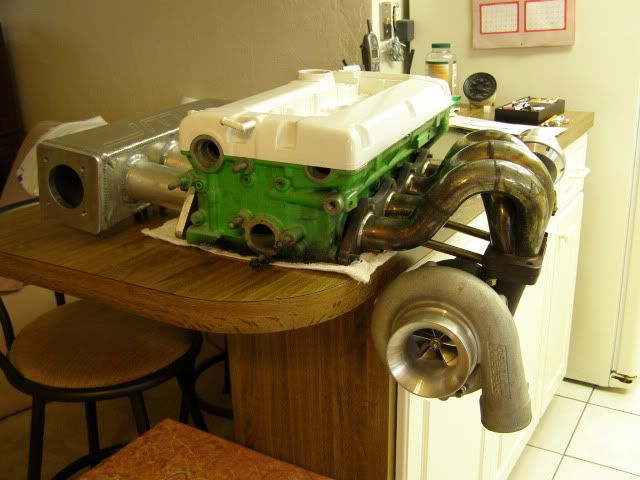
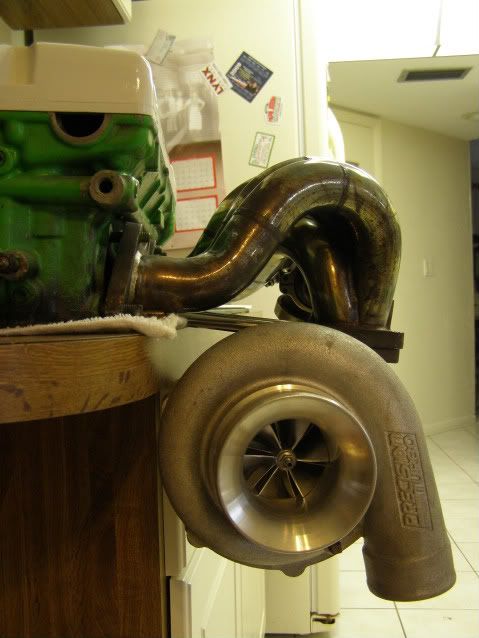
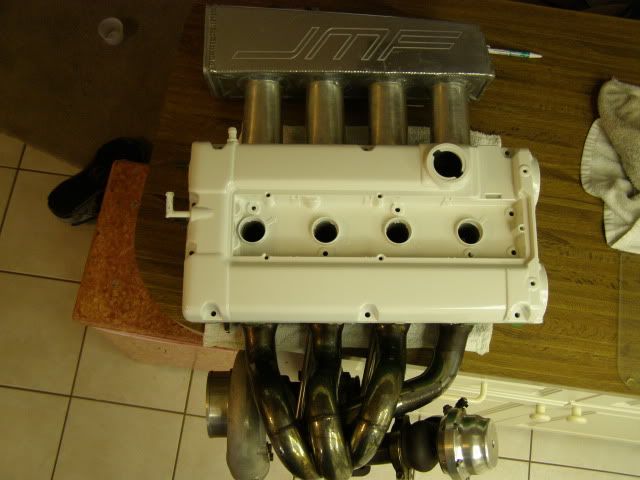
I also got sick of trying to imagine what everything was going to look like so I decided to "mock up" everything...

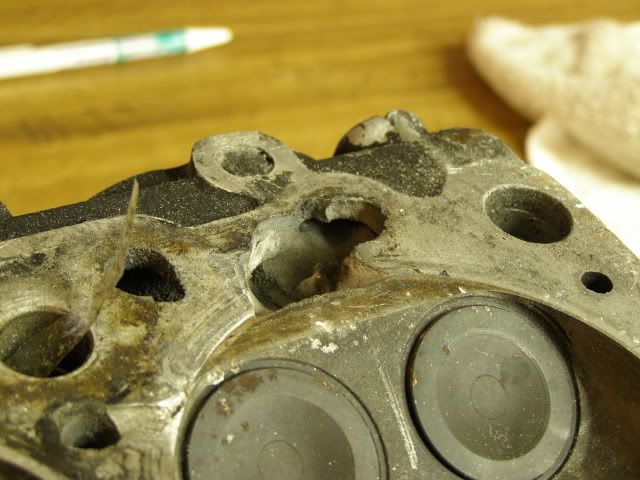
And before anyone says anything about the head. Heres a pointless little story. A friend of mine had a head at his house that was Painted green. I guess it was given to him from a friend of his that saw it on the side of the road where someone was throwing it out. The person told him "well the damn thing was green so I figured it must be for a honda", well unfortunately it turned out to be a 4g head. So he gave it to me. It is for mock-up purposes only as it has some major detonation scars. I like to throw this thing from time to time too, so it also qualifies as a stress reliever. Here is the sweet hole in the bowl.
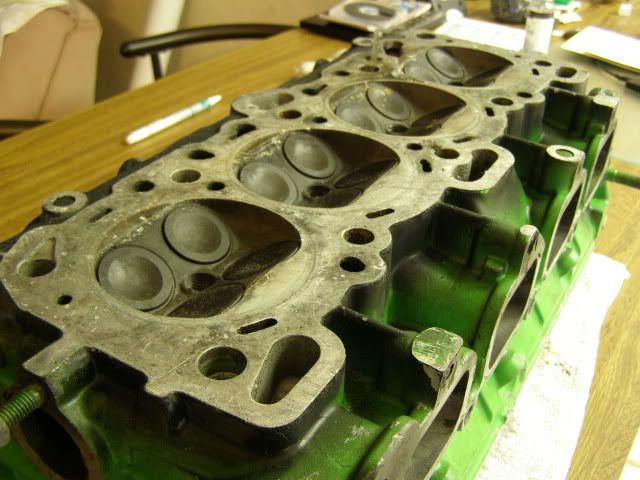
Image

Image

Here is everything just hanging off the head :)

Image

Image

Image

That's all folks.


Top
   
Display posts from previous:  Sort by  
Post new topic  Reply to topic  [ 171 posts ]  Go to page Previous 1 2 3 4 512 Next

All times are UTC-05:00


Who is online

Users browsing this forum: No registered users and 20 guests


You cannot post new topics in this forum
You cannot reply to topics in this forum
You cannot edit your posts in this forum
You cannot delete your posts in this forum
You cannot post attachments in this forum

Jump to:  
cron
Powered by phpBB® Forum Software © phpBB Limited